
Stop Staring at Blank Walls: DIY Architectural Panels & Slat Walls Anyone Can Pull Off
When Your Walls Are Giving Beige Flag Energy
If your walls are currently smoother than your last dating app conversation, it is time for an intervention. The internet is officially obsessed with DIY architectural wall panels, wood slat walls, and fluted accents—and for once, the algorithm is right. These projects are the glow-up equivalent of taking your walls from “intern” to “creative director” with nothing more than some wood strips, paint, and a free weekend.
Instead of yet another painted accent wall (we’ve all done the moody green thing, it’s fine), people are adding 3D wall decor that brings depth, texture, and pure main-character energy to living rooms and bedrooms. Think: vertical wood slats behind the TV, fluted panels framing the fireplace, and box trim turning a boring bedroom into a boutique hotel suite.
This guide breaks down the latest trends in DIY slat walls, fluted wall panels, and picture frame molding—with practical tips, cost-saving hacks, and just enough chaos-control advice to keep you from gluing yourself to the drywall.
Why Architectural Wall Panels Are Suddenly Everywhere
Trend-wise, we are in the golden age of “I built this with my own slightly confused hands.” On TikTok, YouTube, and Reels, DIY slat wall
, fluted wall panels
, and accent wall ideas
are rocketing up searches because these projects hit a magical design sweet spot:
- High drama, low trauma: You get that custom, “did you hire an architect?” look without moving a single wall.
- Algorithm catnip: The cut–glue–paint–reveal format is wildly satisfying, which means more tutorials, more ideas, and more “I could do that” moments.
- Rental-friendly options: Removable slat panels and peel-and-stick versions let renters have nice things without sacrificing their deposit to the landlord gods.
- Aesthetic chameleon: Slat walls play nicely with Japandi, Scandinavian, warm minimalism, modern, and even farmhouse when styled right.
Translation: this is not a fleeting “chevron-everything” moment. Architectural wall treatments are quietly becoming a new classic, because they add architecture where there was previously just… sheetrock and vibes.
Choose Your Wall Persona: Slat, Fluted, or Fancy Trim?
Before you start power-tool flirting at the hardware store, pick your wall’s new personality. Each trending style has its own flavor (and budget).
1. Vertical Wood Slat Walls – The Cool Minimalist
Vertical slat walls are the design equivalent of a perfectly tailored blazer: sharp, modern, and weirdly flattering to everything around them. You’ll see them:
- Behind TVs as a media wall
- Behind beds as a full-width, floor-to-ceiling slat headboard wall
- Behind sofas to define a zone in open-plan living rooms
Popular looks:
- Walnut stain: Warm, rich, and a little “I read design magazines on purpose.”
- Matte black: Dramatic, contemporary, and perfect for LED backlighting.
- Natural pine or oak: Light, airy, and straight out of a Scandinavian Pinterest board.
2. Fluted or Reeded Panels – The Soft-Spoken Show-Off
Fluted walls are like slat walls’ softer, curvier cousin. Instead of separate boards, you get a gentle, repeated curve across the wall. DIYers are using:
- Half-round molding
- Pole wrap (the flexible wood used to wrap support columns)
- Flexible trim for curved or tricky walls
These are trending big-time for:
- Fireplace surrounds
- Statement headboard walls
- Entryway or hallway feature walls
3. Box Trim & Picture Frame Molding – The Quiet Luxury Classic
If your heart beats faster in hotel hallways (just me?), you’ll love this. Box trim or picture frame molding uses flat or slightly profiled trim to create rectangles or squares on the wall. It is especially popular in:
- Living rooms with a traditional or Parisian vibe
- Bedrooms aiming for “boutique hotel” energy
- Dining rooms that need some architectural bones
The chic move: paint the trim and the wall the same color for a subtle, shadowy effect that whispers “custom millwork” instead of screaming “I discovered a trend on TikTok.”
Planning 101: Measure Twice, Cry Zero Times
Before buying every piece of trim in the store like a feral DIY raccoon, do a little planning. Your future self, covered in paint but emotionally stable, will thank you.
- Decide your zone.
Will your feature live behind the TV, the bed, the sofa, or on that awkward wall you pretend doesn’t exist? Mark the area with painter’s tape so you can see the scale in real life. - Choose full wall vs. partial wall.
A full-height, wall-to-wall treatment feels “architecture.” A partial section behind furniture can be just as impactful and cheaper in materials. - Sketch it out.
Nothing fancy—just a quick drawing with rough measurements. For slat walls, decide:- Slat width (commonly 1–3 inches)
- Gap size between slats (often the same as slat width)
- Set a realistic budget.
Materials like pine, MDF, and pole wrap are friendlier on the wallet than hardwood. Factor in: wood, adhesive, nails (if used), primer, paint or stain, and potential tool rental.
Tip: if math and you are not on speaking terms, there are plenty of free online slat wall calculators and molding-spacing guides—use them shamelessly.
Materials & Tools: The Not-Scary Shopping List
You do not need a full workshop. You mainly need courage, a straight edge, and the ability to walk confidently into the lumber aisle.
Core materials
- Pine or MDF strips for slat walls and box trim
- Pole wrap, half-round trim, or flexible molding for fluted walls
- Construction adhesive (look for one safe for interior use and your wall type)
- Finishing nails or a brad nailer (optional but helpful)
- Wood filler and caulk for a pro-level finish
- Primer and paint or stain
Helpful tools (but many have workarounds)
- Miter saw or handsaw with a miter box
- Level and tape measure
- Stud finder (especially for heavier installs)
- Sanding block or electric sander
- Painter’s tape
Rent or borrow what you can—most big-box stores rent saws and nailers, and tool-loving friends are surprisingly easy to bribe with cookies.
How to DIY a Vertical Wood Slat Wall (Without Losing Your Mind)
This is the project filling your For You Page right now, especially behind TVs and beds. Here is a simple, sanity-friendly version.
- Prep the wall.
Remove outlet covers, lightly sand glossy paint, fill major holes, and give the wall a quick wipe-down. If you are painting the base color, do it now. - Cut and sand your slats.
Cut all pieces to the same length (ceiling height or the height of your feature area). Sand edges so you don’t create a “splinter feature wall.” - Stain or paint first (optional but easier).
Staining or painting slats before install can be less awkward than trying to jam a brush into all the gaps later. Touch up once they are on the wall. - Find your starting line.
Use a level to mark a straight vertical line where your first slat will go. The first piece sets the tone for the whole wall—treat it like the first pancake. - Attach the slats.
Apply construction adhesive to the back, press onto the wall, and tack with a nail or two if needed. Use a spacer (a scrap piece of wood cut to your chosen gap size) between slats to keep things consistent. - Finish like a pro.
Fill nail holes, caulk edges where slats meet other walls or baseboards, and touch up stain or paint. Reattach outlet covers (paint them to match if you want that sleek built-in look).
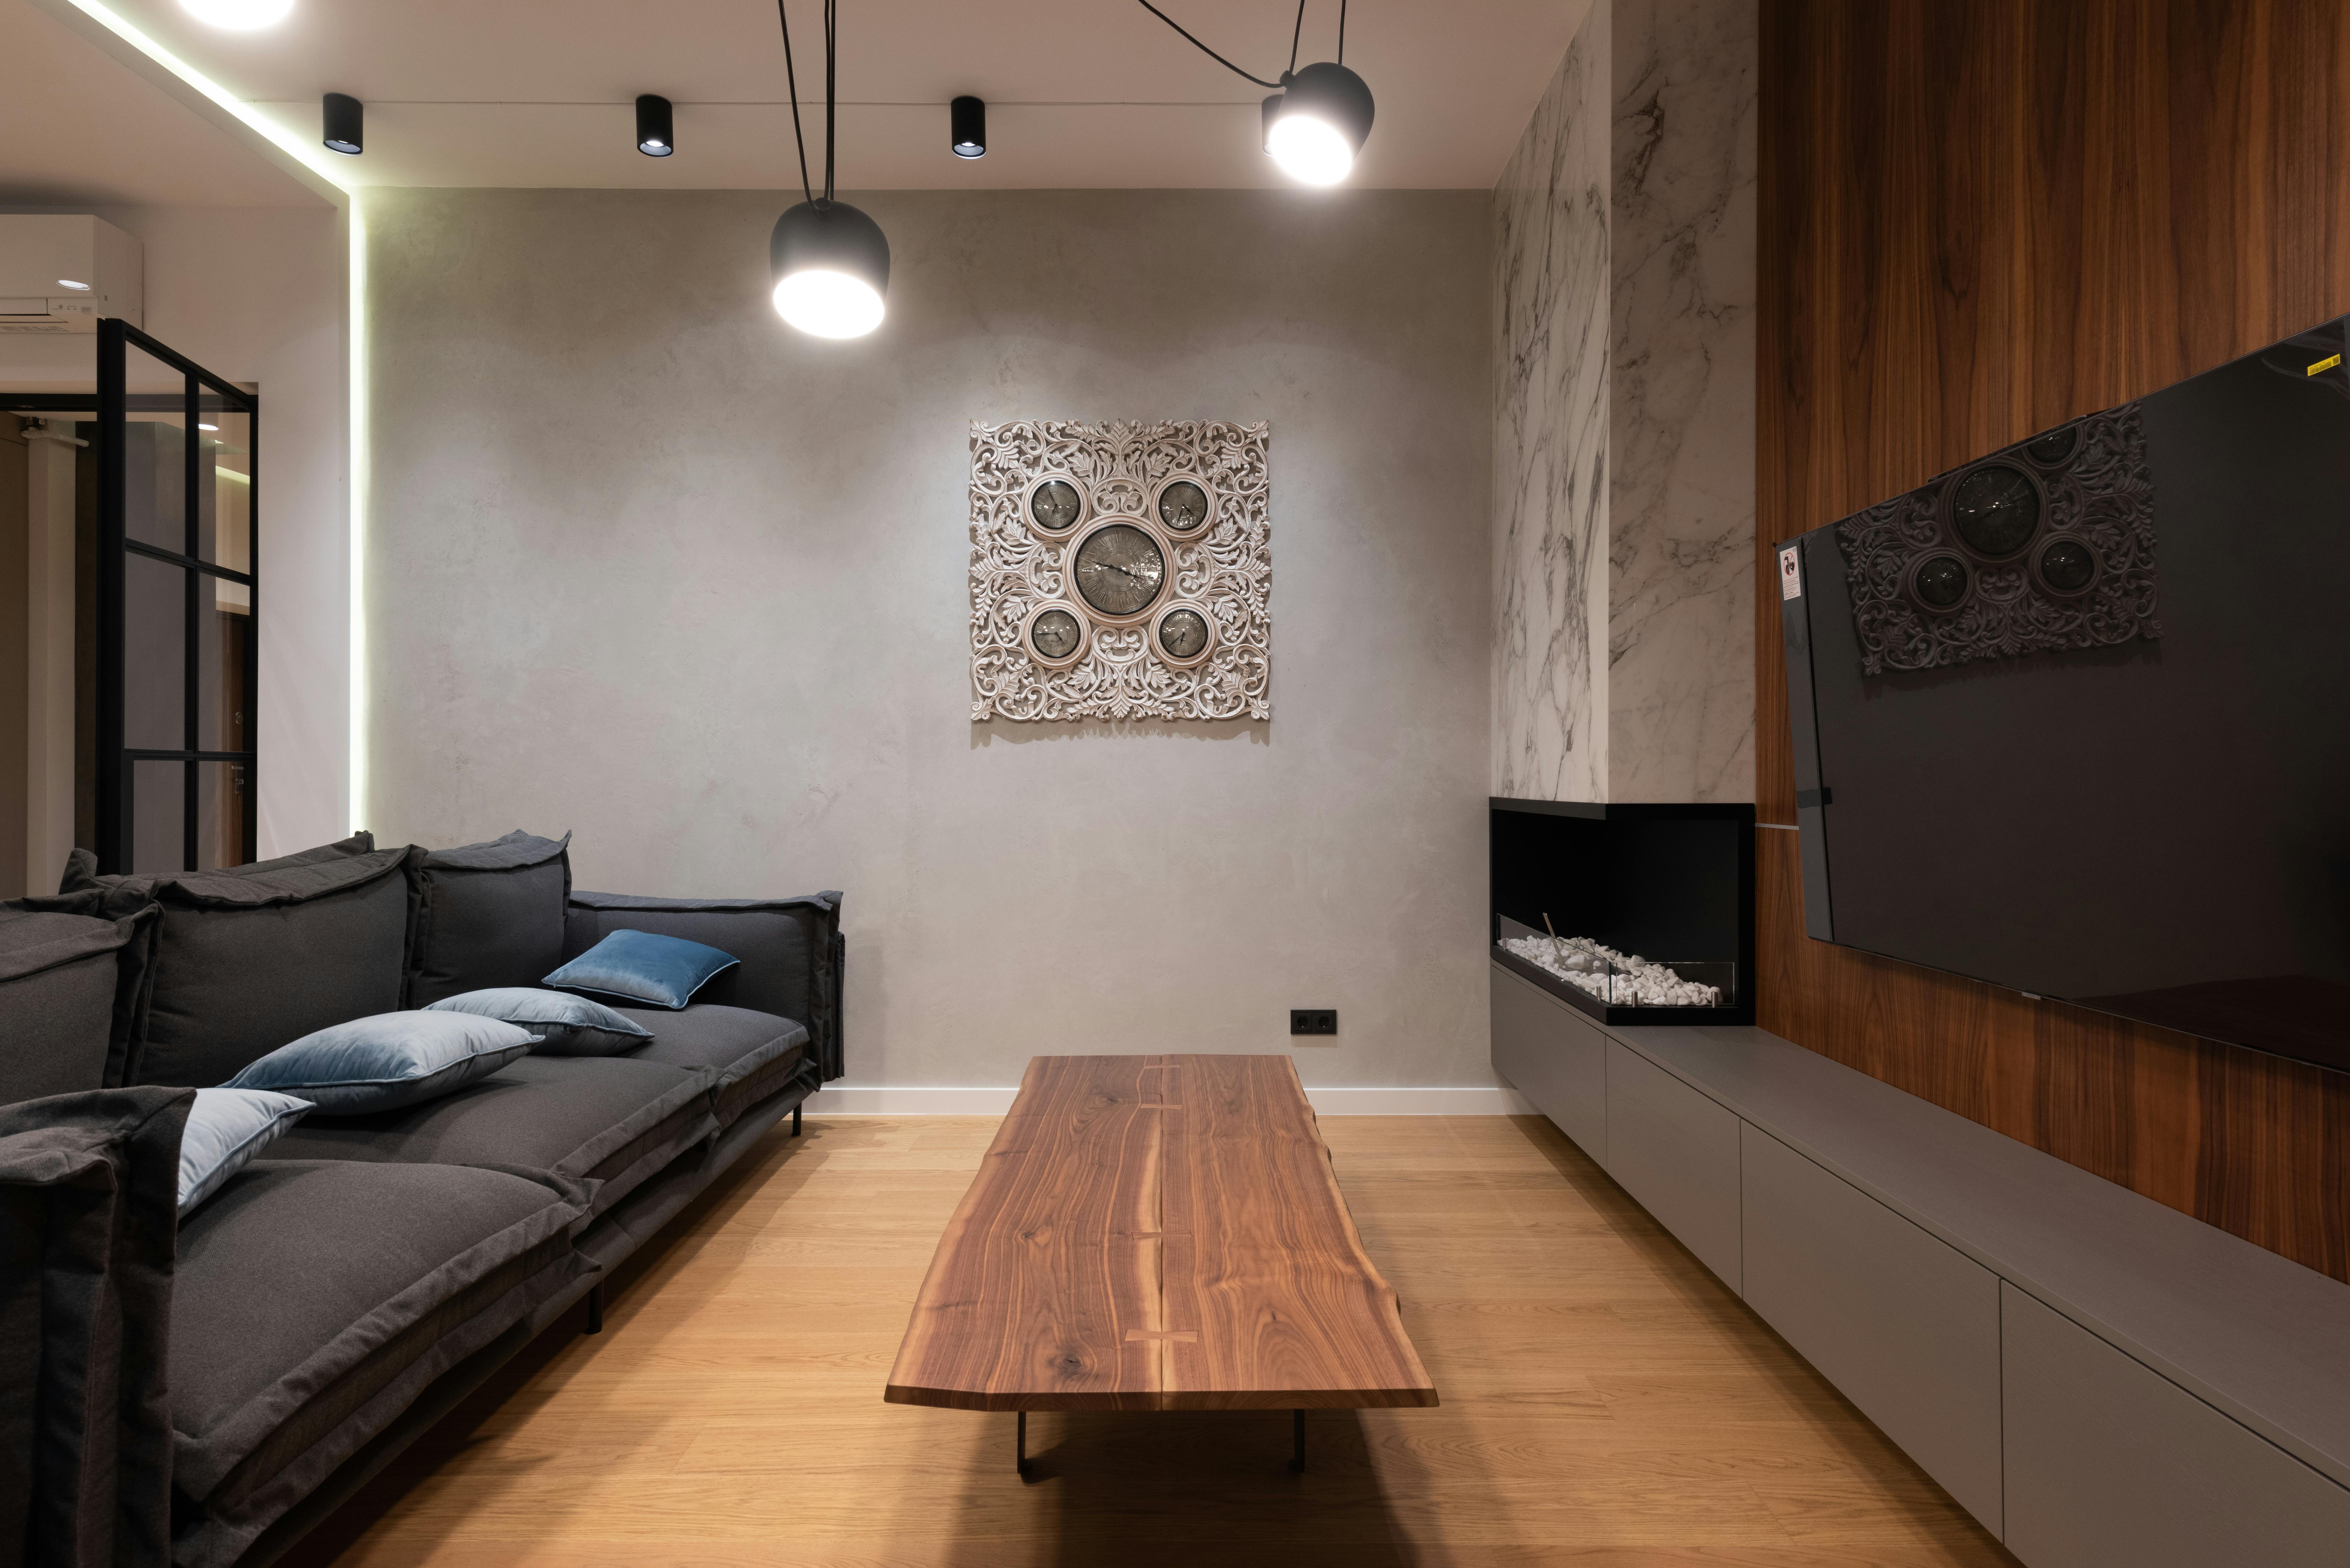
Bonus flex: add LED backlighting behind a TV or along one edge of the slat wall for a futuristic media wall moment.
Fluted & Reeded Panels: Soft Curves, Big Impact
Fluted walls are perfect when you want texture, but your design style is less “hard lines” and more “gentle waves.” Here’s how DIYers are pulling it off:
- Pole wrap magic: Cut pole wrap to the height of your feature zone, adhere it to the wall with construction adhesive, and clamp or brace while it dries.
- Half-round molding: Attach each piece vertically, side by side, like tiny noodles lined up for inspection. This takes longer but lets you customize the spacing and width.
- Flexible trim: Great for awkward corners or slightly curved walls where rigid panels would fight you.
Paint is your best friend here. A single, rich color over fluted texture looks incredibly high-end—deep taupes, earthy terracottas, and inky blues are trending especially hard in bedrooms and living rooms.
Box Trim & Picture Frame Molding: Fake That Architectural Heritage
For anyone whose home came with zero original details and 100% builder beige, this is your redemption arc.
- Mark your layout.
Use painter’s tape to block out rectangles or squares on the wall. Step back and adjust until it feels balanced relative to ceiling height, windows, and furniture. - Cut your pieces.
Measure each side of every “frame” and cut your trim with 45-degree mitered corners. Number the back of each piece and its matching spot on the wall with light pencil markings. - Attach and align.
Use adhesive plus a few nails if needed. Check each piece with a level; slightly crooked trim is more obvious than a crooked picture frame. - Fill, sand, and paint.
Fill nail holes and seams, sand smooth, then paint the wall and trim together. A monochrome color scheme is the current favorite because it lets shadows do the talking.
This treatment is especially stunning in a bedroom with a box-trim headboard wall behind the bed, or in a dining room paired with a slim picture ledge for art.
Renter-Friendly Hacks: Commitment Issues Welcome
If your lease is stricter than your high-school math teacher, you can still play the architectural game—just with removable upgrades.
- Pre-built slat panels: Build your slats on a thin plywood or MDF board, then mount the entire panel with screws into wall studs. When you move, patch a few holes and take your masterpiece with you.
- Removable mounting strips: For lighter trim or short sections, heavy-duty removable strips can sometimes work. Test on a small area first.
- Peel-and-stick options: Some companies now offer peel-and-stick slat or fluted panels. They cost more but save time and wall repairs.
Always check your lease and test any adhesive in a low-visibility spot first. Your future security deposit will appreciate the caution.
Styling Your New Wall: Don’t Let It Upstage Everything
Once your wall is looking like a magazine spread, it is tempting to throw every decor item you own at it. Resist. Let the texture do some of the talking.
- Behind a TV: Keep decor minimal—maybe a low console, a plant, and a few discreet objects. The wall is already doing a lot.
- Behind a bed: Treat it as an oversized headboard. Add simple bedding with layered textures: linen, knit throws, and a few pillows—not a mountain that requires climbing gear.
- In a living room: If the wall is busy (slats, flutes), keep art large and simple, or skip it and let sconces or a single bold piece of art shine.
Think of your new wall as the lead actor. Everything else in the room should be supporting cast, not competing divas.
Common Mistakes (So You Can Avoid the “Oh No” Phase)
- Skipping wall prep: Texture, bumps, or glossy paint can keep adhesive from bonding well. A quick sand and wipe-down can save disasters later.
- Forgetting outlets and switches: Plan how slats or trim will interact with these. You may need to notch pieces or slightly adjust your layout.
- Inconsistent spacing: Eye-balling gaps between slats usually ends in regret. Use a spacer every time.
- Too many feature walls: One strong architectural wall per room is usually enough. Two can work in large, open spaces, but be intentional.
Remember, DIY is allowed to look chaotic halfway through. If your room looks like a lumber yard mid-project, that just means you are in the “before” photo.
Your Walls Are Ready for Their Close-Up
DIY architectural wall panels, slat walls, and fluted accents are trending for a reason: they deliver big visual impact, serious “custom home” energy, and surprisingly doable weekend projects. Whether you are going for modern media wall, cozy Japandi bedroom, or classic box-trim living room, one textured wall can completely shift the mood of your home.
So the next time your walls are silently judging you for hanging the same art in the same place for five years, remember: a few strips of wood, a bit of paint, and a pinch of courage are all that stand between “rental white cube” and “wow, who designed this place?”
Relevant Image Suggestions
Below are strictly relevant, royalty-free image suggestions that directly support key sections of this blog. Each image is chosen to visually explain the concept discussed.
Image 1 – DIY Vertical Wood Slat Media Wall
Placement: Immediately after the paragraph in the section “How to DIY a Vertical Wood Slat Wall (Without Losing Your Mind)” that mentions LED backlighting and media walls.
Supported sentence/keyword: “Bonus flex: add LED backlighting behind a TV or along one edge of the slat wall for a futuristic media wall moment.”
Image description (for generation or selection):
- Realistic photo of a living room media wall.
- Wall covered with vertical wood slats in a warm walnut tone, spanning from floor to ceiling behind a wall-mounted flat-screen TV.
- Subtle LED strip backlighting behind the TV or along one side of the slat wall, casting a soft glow.
- A simple low media console under the TV, with minimal decor (e.g., a plant and a small stack of books).
- Neutral walls and flooring so the slat feature wall is clearly the focal point.
- No visible people, no abstract decor, no unrelated objects.
SEO-optimized alt text: “Vertical wood slat media wall with LED backlighting behind a wall-mounted TV in a modern living room.”
Example royalty-free URL (verify 200 OK before use):
https://images.pexels.com/photos/6585763/pexels-photo-6585763.jpeg
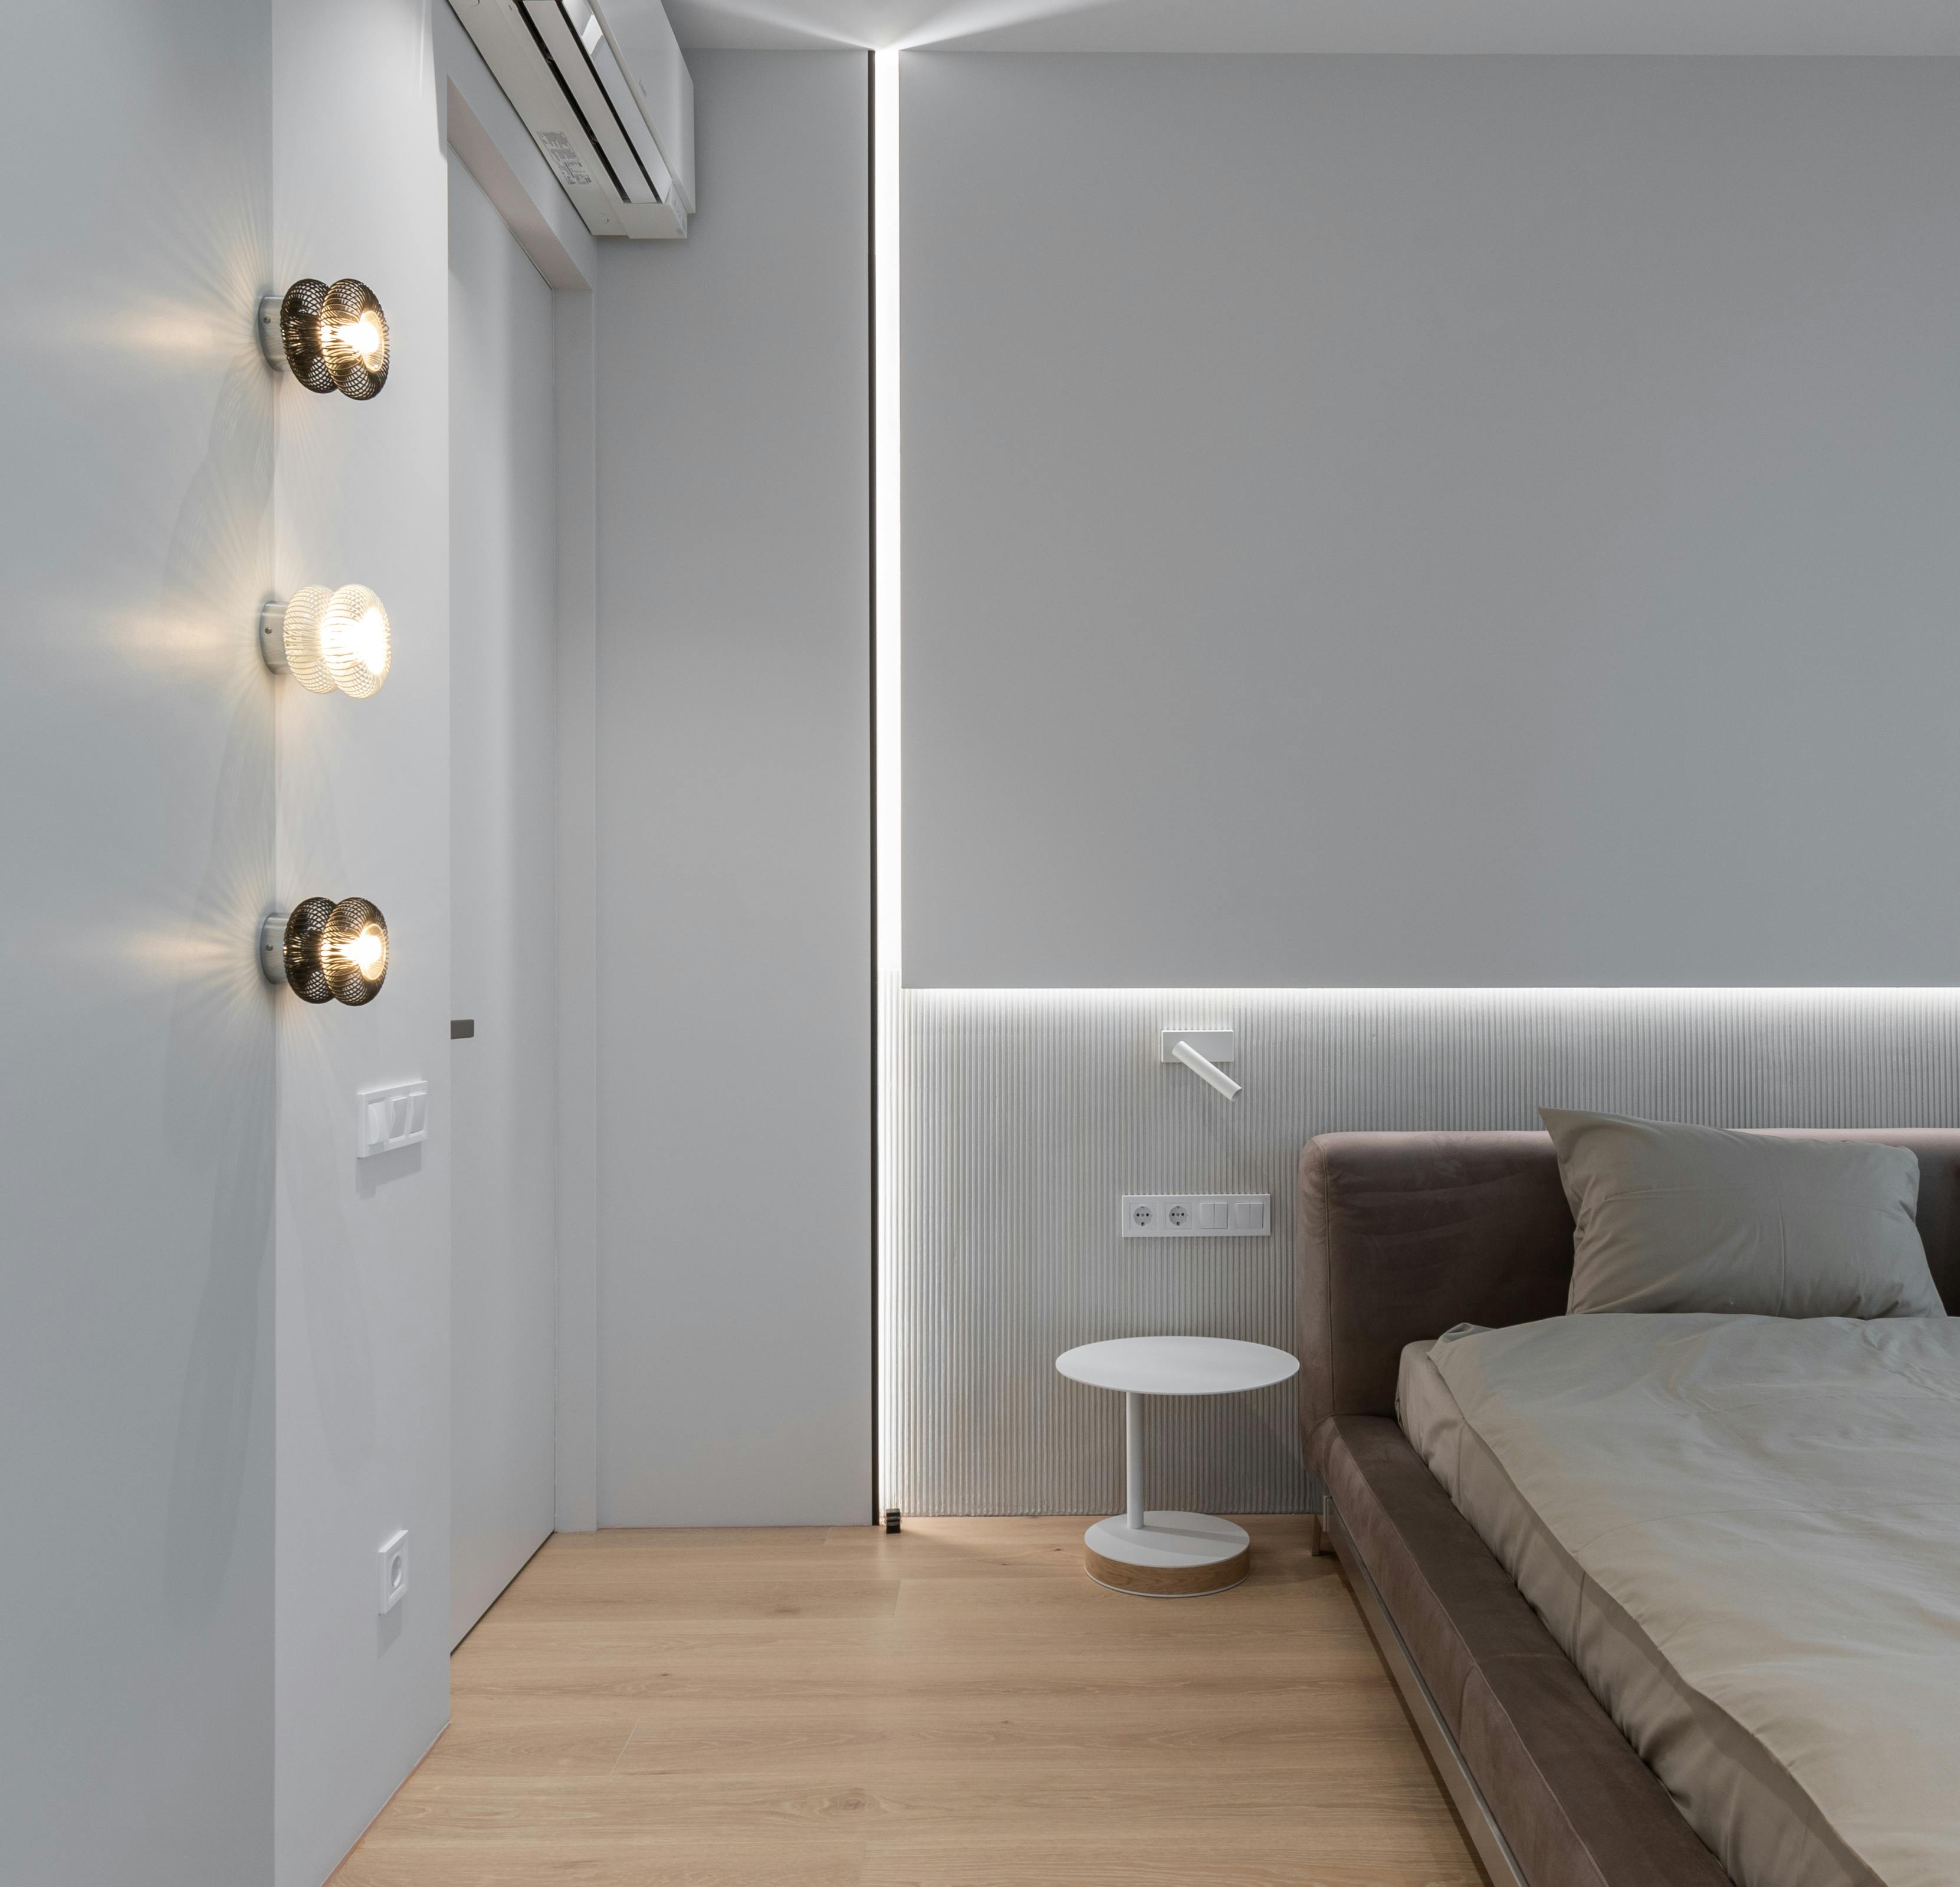
Image 2 – Fluted Wall Behind Bed (Headboard Wall)
Placement: In the section “Fluted & Reeded Panels: Soft Curves, Big Impact,” after the paragraph describing fluted walls in bedrooms and living rooms.
Supported sentence/keyword: “They are trending big-time for: Fireplace surrounds, statement headboard walls, Entryway or hallway feature walls.”
Image description (for generation or selection):
- Realistic bedroom photo with a full-width fluted or reeded feature wall directly behind the bed.
- Vertical fluted wood or MDF panels painted a rich, modern color (e.g., deep blue, taupe, or terracotta).
- Simple, neutral bedding so the fluted wall remains the star.
- Minimal bedside tables and lighting—e.g., small wall sconces or slim lamps.
- No visible people, no unrelated decorative clutter.
SEO-optimized alt text: “Bedroom with a painted fluted wall feature behind the bed used as a statement headboard wall.”
Example royalty-free URL (verify 200 OK before use):
https://images.pexels.com/photos/6588002/pexels-photo-6588002.jpeg
Image 3 – Box Trim / Picture Frame Molding Wall
Placement: Within the section “Box Trim & Picture Frame Molding: Fake That Architectural Heritage,” after the step-by-step list.
Supported sentence/keyword: “This treatment is especially stunning in a bedroom with a box-trim headboard wall behind the bed, or in a dining room paired with a slim picture ledge for art.”
Image description (for generation or selection):
- Realistic interior photo of a living room or bedroom wall featuring box trim / picture frame molding.
- Rectangular molding shapes painted in the same color as the wall for a monochrome, shadowed effect.
- Simple furnishings in front of the wall (e.g., a sofa or bed) that do not obscure the molding detail.
- Soft, natural lighting to clearly show the dimensional effect of the trim.
- No people, no abstract art that distracts from the molding.
SEO-optimized alt text: “Monochrome wall with box trim picture frame molding behind minimalist furniture in a modern home.”
Example royalty-free URL (verify 200 OK before use):
https://images.pexels.com/photos/6588572/pexels-photo-6588572.jpeg
