
From Beige to Bougie: Budget DIY Room Makeovers That Look Way More Expensive Than They Are
Budget Makeovers, Champagne Vibes: Welcome to Your Wallet‑Friendly Glow‑Up
Budget DIY room makeovers are having a full‑blown moment online, and honestly, it makes sense: living costs are up, renovation quotes are rude, and yet our living rooms still insist on being beige and slightly depressing. The good news? You do not need a full remodel or a reality TV crew to pull off a jaw‑dropping before‑and‑after. With paint, lighting, and a few clever swaps, you can transform your space from “meh” to “who lives here and are they accepting guests?” on a budget that does not break your soul (or your savings).
Today’s mission: a high‑impact, low‑cost room transformation that leans hard into DIY, renter‑friendly tricks, and easy wins you can finish in a weekend—even if your skill level currently starts and ends at “owns a screwdriver.” We will paint, we will hack IKEA, we will wrangle cords like the chaos goblins they are, and we will absolutely hang the curtains higher than your last electric bill.
Think of this as the cozy, relatable version of a makeover show: no fake deadlines, no drama—just you, a paint roller, some plug‑in lighting, and decor choices so smart your landlord might ask for your mood board.
Step 1: Make a Plan Before You Make a Mess
Before you start flinging paint around like an emotionally unstable artist, pause. The internet’s most satisfying $300 living room makeovers and “renter‑friendly bedroom glow ups” all have one thing in common: a game plan.
Ask yourself three quick questions:
- What bothers you most right now? Clutter? Dark corners? Tiny rug? Random furniture chaos?
- What’s the room’s main job? Relaxing, working, entertaining, sleeping, or all of the above?
- What can’t you change? Rental rules, weird windows, immovable furniture, or “that one wall” with 14 cables.
Once you know your pain points, pick one room and then break the makeover into four clear phases that today’s trending DIYers swear by:
- Declutter & rearrange
- Paint (walls or furniture—or both)
- Upgrade lighting
- Layer textiles and key decor
Treat each phase like an episode in your own home makeover series. You are the star, and the commercial break is when the paint dries.
Step 2: The Zero‑Dollar Makeover Phase (a.k.a. Declutter & Shuffle)
The cheapest makeover move you can make? Removing stuff. Decluttering is trending hard because it delivers instant visual calm and costs exactly zero dollars—unless you celebrate with takeout after, which is fully endorsed.
Try this one‑hour reset:
- Gather a laundry basket and do a quick sweep: random decor, extra pillows, dead plants (RIP), and anything that doesn't serve the room’s purpose.
- Clear every surface: coffee table, nightstands, TV console. Put everything in the basket.
- Put back only what you love or actually use. If you have to think about it, it probably belongs elsewhere.
Next, shop your house. That mirror in the hallway? Maybe it belongs above the dresser. The cute lamp in the guest room nobody uses? Bedroom upgrade. You are not redecorating; you are re‑casting.
If it doesn’t make the room more useful or more beautiful, it is just loitering.
Step 3: Paint – Your Budget’s Best Friend With Main‑Character Energy
On every platform right now, paint is the star of budget transformations. It is cheap, dramatic, and forgiving—like a telenovela love interest for your walls.
Trending budget‑friendly paint moves:
- Warm neutral walls – Think soft greige, creamy beige, or warm white. They make small rooms feel bigger and play nicely with almost any decor.
- Moody feature wall – Deep green, charcoal, or chocolate brown behind the bed or sofa adds grown‑up drama without overwhelming the room.
- Two‑tone walls – A darker color on the bottom third and lighter on top, split with a simple piece of trim or even painter’s tape “faux trim.” Instant boutique hotel vibes.
- Painted arches & shapes – Arched headboard murals, painted “zones” behind desks, or color‑blocked TV walls are all over TikTok and Reels for a reason: they look custom on a thrift‑store budget.
Don’t forget the furniture:
Mismatched nightstands, yellowed IKEA dressers, and tired TV consoles are being reborn daily with satin furniture paint and new hardware.
- Stick to one color family to unify random pieces.
- Use primer on laminate and shiny finishes so your hard work survives life.
- Swap basic knobs for matte black, brass, or even leather pulls for a “custom but not painful” upgrade.
Paint is where you can be brave. If you hate it, you can paint again. If only all life choices were that reversible.
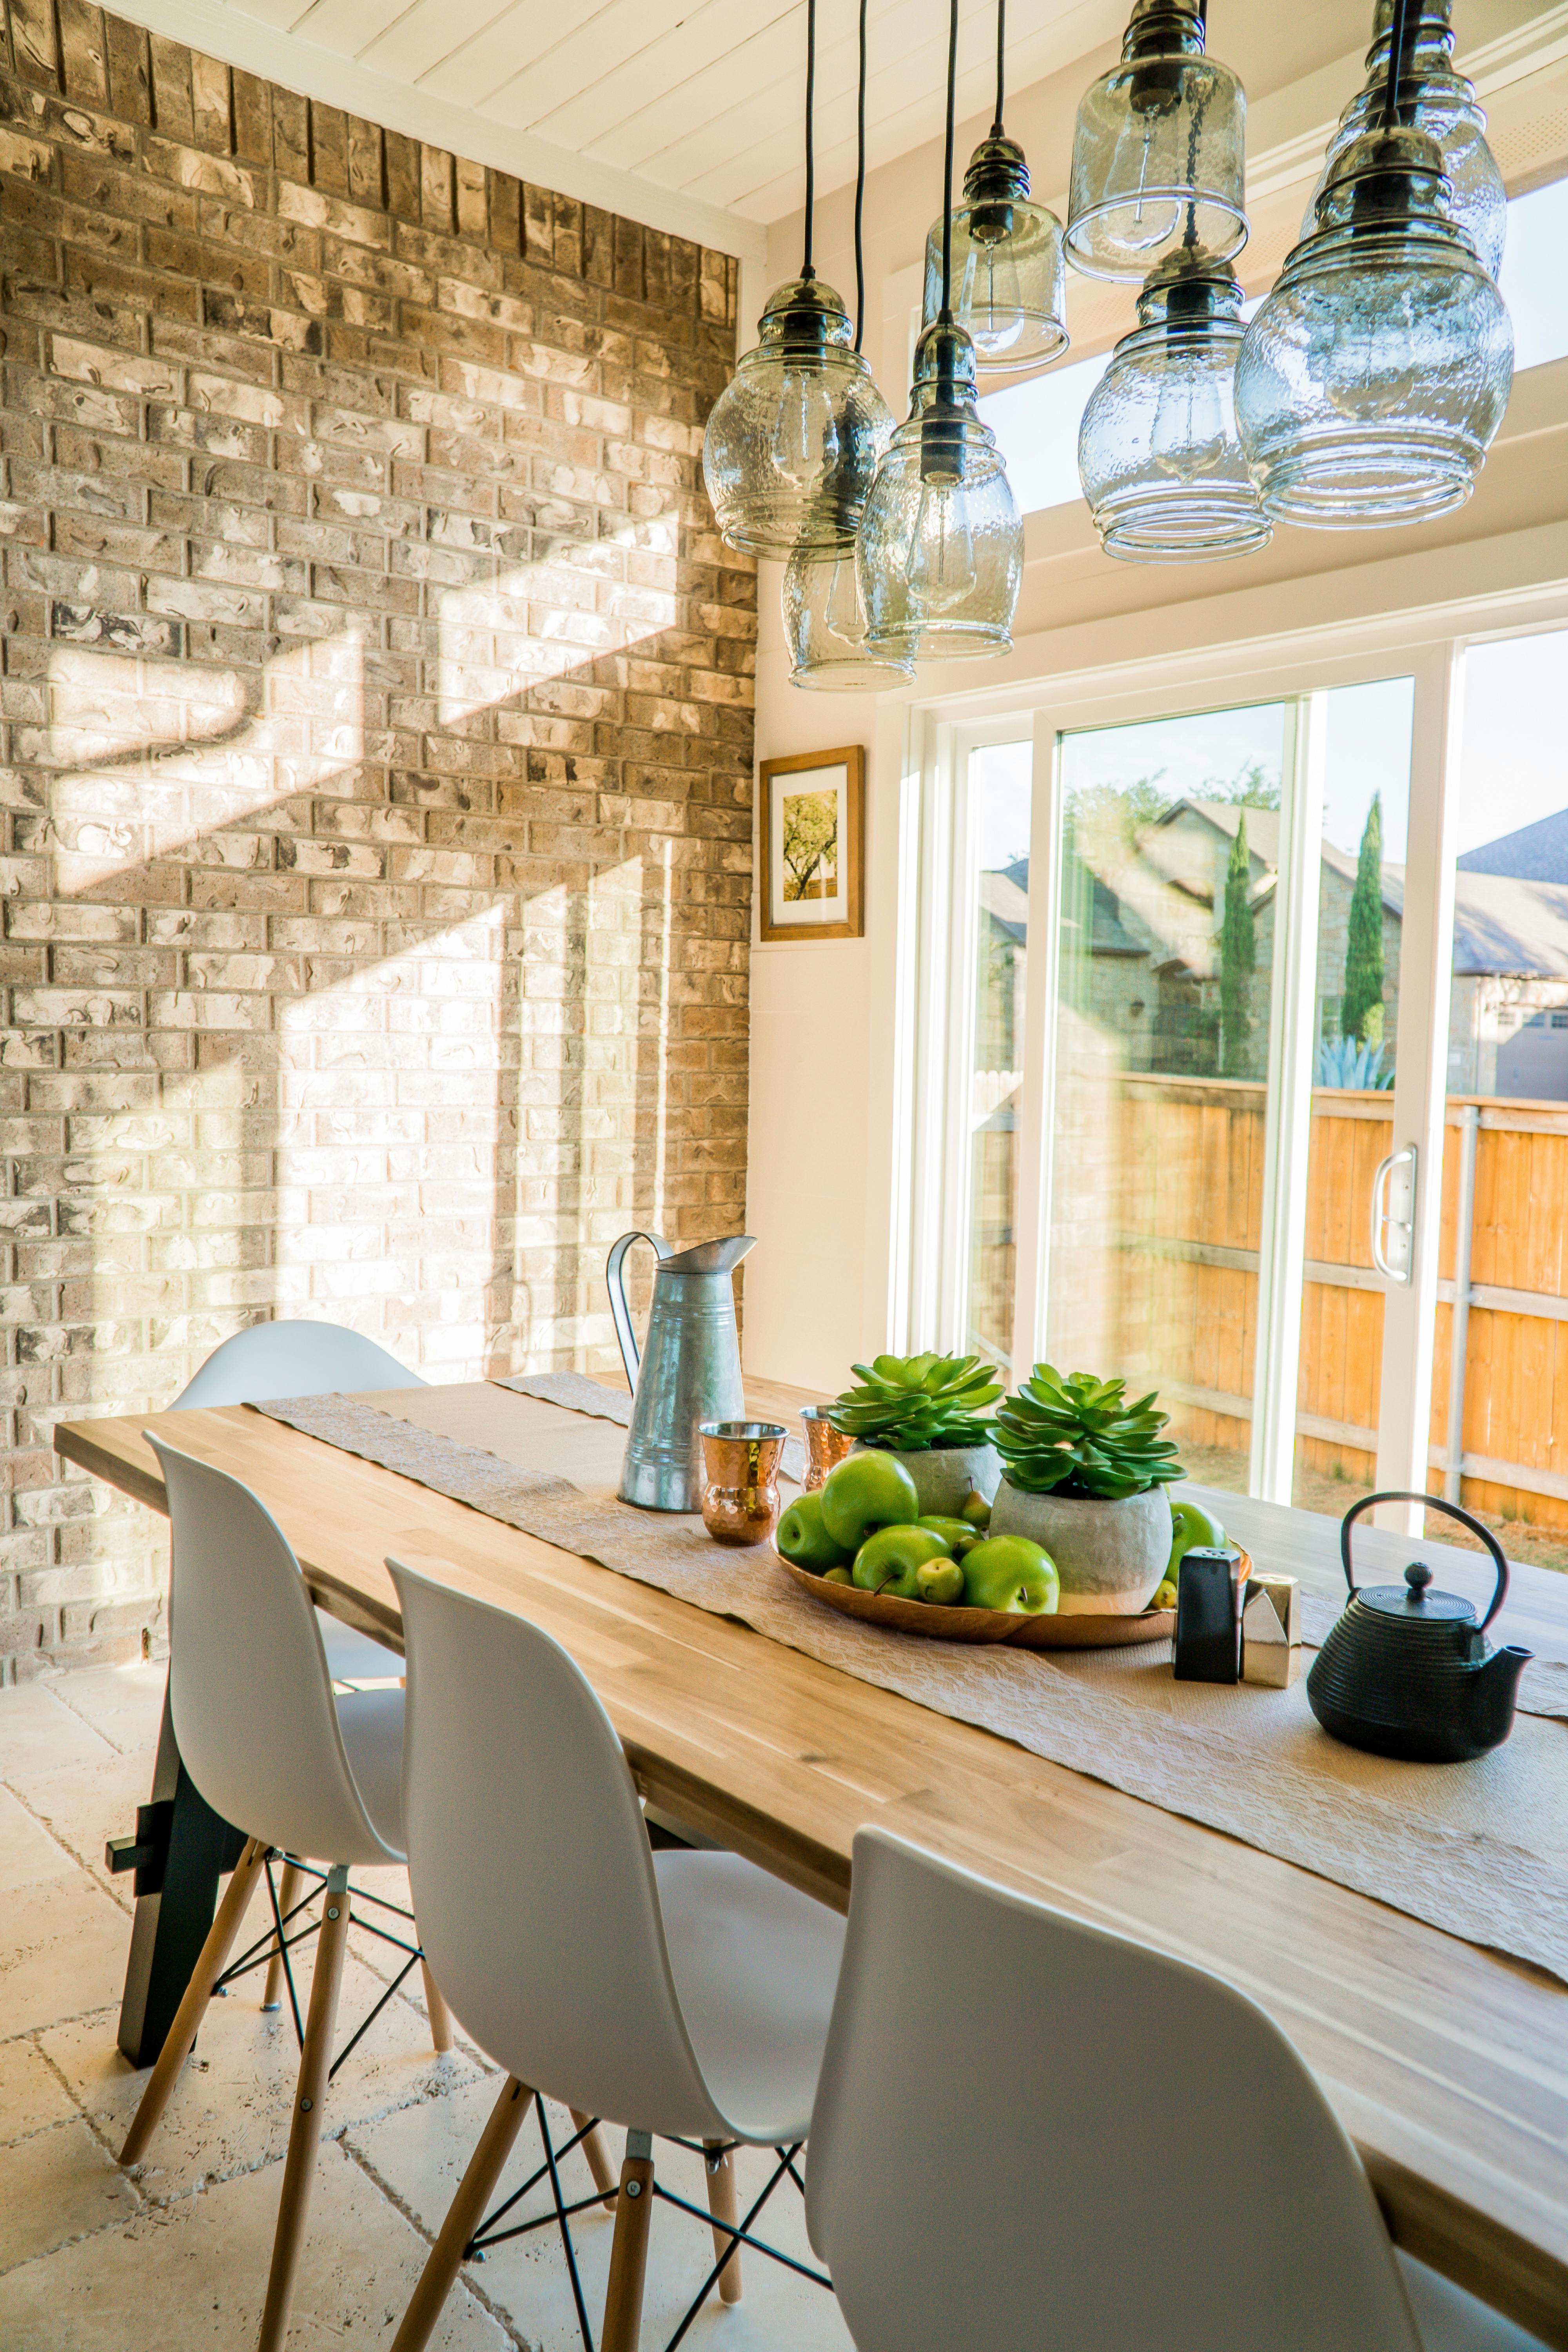
Visual Inspiration: A Cozy, Budget‑Friendly Living Room Refresh
This scene captures several of today’s biggest budget‑makeover trends in one space: warm neutral walls, layered lighting, a large rug to anchor the seating area, and simple decor that feels intentional rather than cluttered.
Step 4: Lighting – Because Your Room Deserves Better Than Overhead Harshness
If your only light source is a single ceiling fixture that feels like an interrogation lamp, no wonder your room is sad. Lighting is where budget makeovers quietly level up from “nice” to “whoa, is this the same space?”
Here is the current glow‑up formula:
- Swap the builder basic – Replace that generic flush mount with a semi‑flush, pendant, or drum shade. There are gorgeous options under $80 that look custom once installed.
- Add plug‑in sconces – Perfect for renters and commitment‑phobes. Mount them above nightstands or beside the sofa, run the cord down the wall, and paint the cord cover the same color as the wall so it disappears.
- Use smart bulbs & warm LEDs – Soft white or warm (2700K–3000K) instantly feels cozy. LED strips behind TVs, headboards, and shelves are huge right now for subtle ambiance without a huge price tag.
- Layer, don’t blast – Aim for 3–4 light sources: overhead + floor lamp + table lamps or sconces + accent lighting. Your retinas will thank you.
Good lighting is like good skincare: once you invest a little, everything else looks better with way less effort.
Step 5: Smart Furniture Swaps & IKEA Hacks That Look Custom
You do not need all‑new furniture; you need right‑sized, multi‑tasking
High‑impact, low‑cost furniture moves:
- Scale things down – In small rooms, trade bulky coffee tables for nesting tables or a storage ottoman. Choose a slimmer TV console so your rug and negative space can breathe.
- Double‑duty heroes – Storage ottomans, sofa beds, lift‑top coffee tables, and wall‑mounted desks are trending in small space makeovers and studio apartments.
- IKEA hacks – From painting IVAR cabinets to adding trim to BILLY bookcases, the internet is currently obsessed with making budget pieces look built‑in. Add:
- Paint in the same color as your walls
- Simple trim or molding pieces
- Upgraded hardware
Before you buy anything, tape out the footprint on the floor with painter’s tape. If you cannot comfortably walk around it, your future self will be cursing present‑you.
Step 6: Rugs, Curtains, and Textiles – The “Rich Aunt” Layer
The fastest way to make a room feel intentionally designed instead of “thrown together during a sale”? Textiles. They are the soft, cozy, “my life is more together than it is” layer.
Current crowd‑favorite tricks:
- Get the rug size right – On every platform under #livingroomdecor, you will see this rule: go bigger. Ideally, front legs of the sofa and chairs sit on the rug. If budget is tight, layer a large jute or flatweave base with a smaller statement rug on top.
- Hang curtains high and wide – Mount rods 4–6 inches above the window frame (or near the ceiling) and extend them past the window edges. Your windows suddenly look taller and grander for the price of a couple of extra inches of fabric.
- Upgrade bedding textures – For bedrooms, trending budget makeovers lean on:
- Crisp white or neutral duvet covers
- One textured throw (waffle knit, chunky knit, or linen)
- 2–3 pillows max. Not 17. This is a bed, not a pillow farm.
- Repeat colors – Pull your palette from one piece: art, rug, or even a favorite shirt. Repeat 2–3 colors around the room so things feel cohesive and intentional.
Textiles are where your room quietly whispers, “Yes, I do drink water and pay my bills on time.”
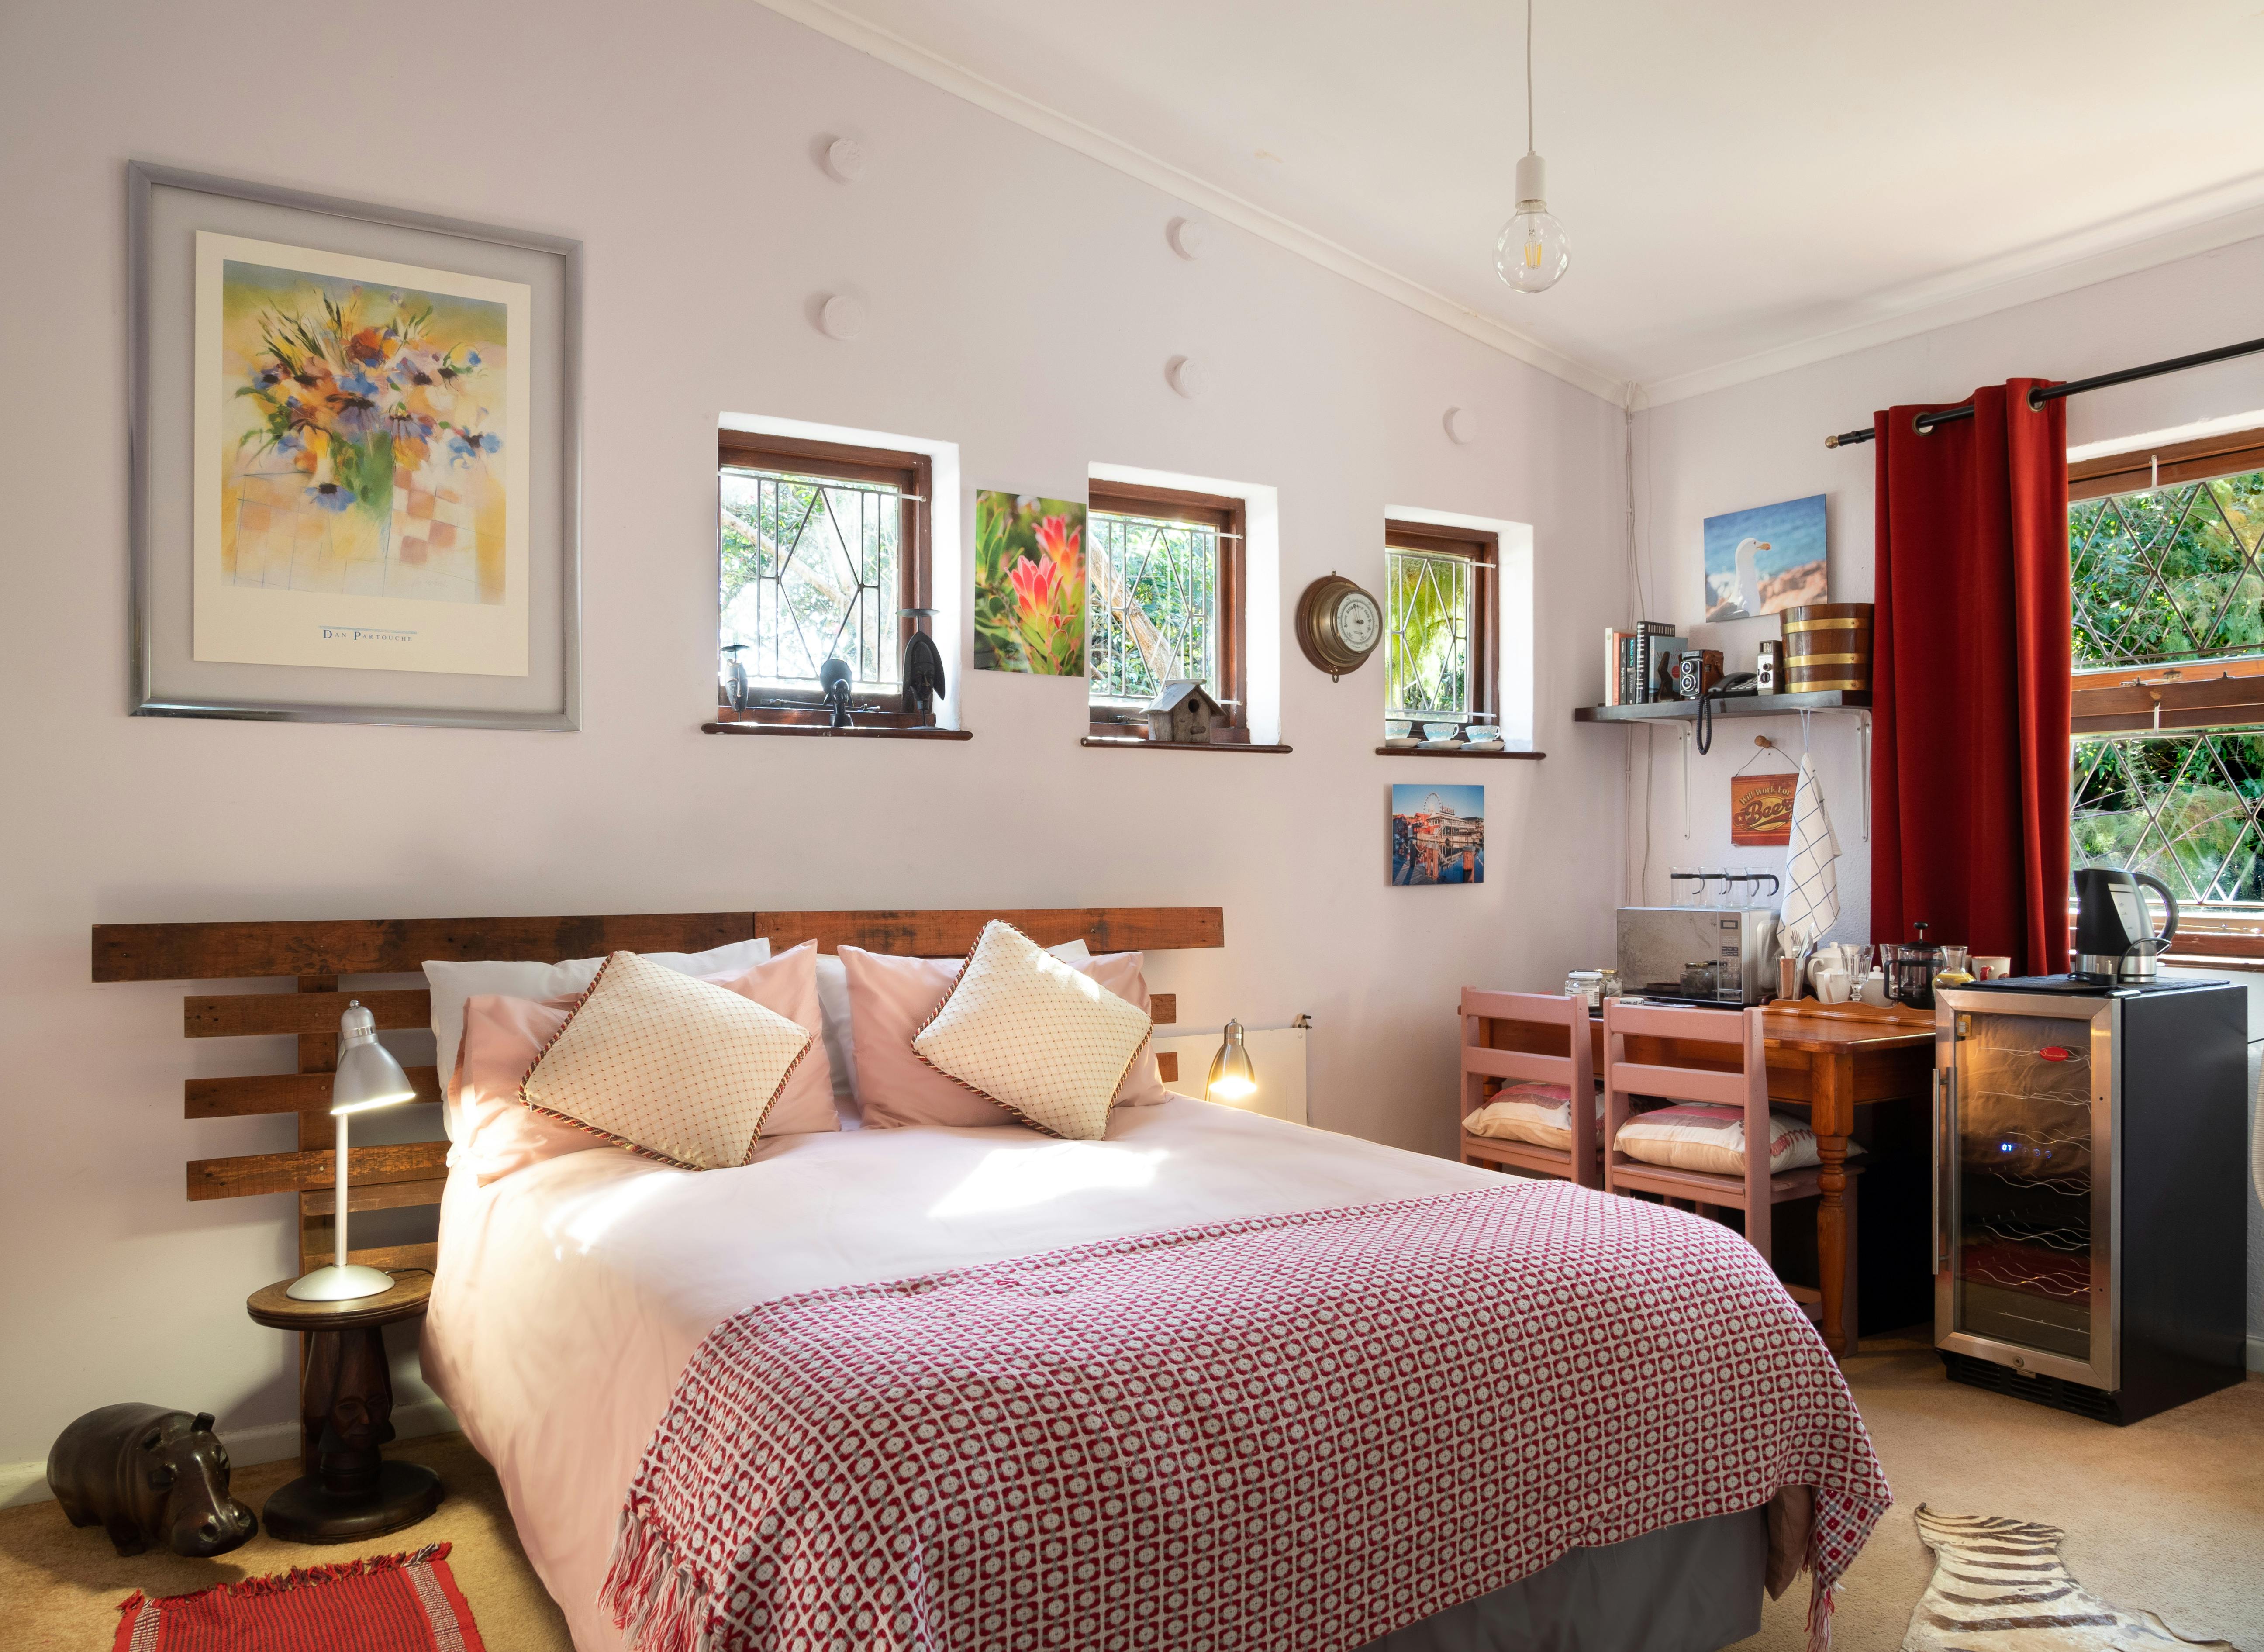
Visual Inspiration: Calm, Budget‑Friendly Bedroom Glow‑Up
This bedroom shows how simple textiles, warm lighting, and a neutral palette create a relaxing retreat without a full renovation—exactly the kind of renter‑friendly makeover trending under #bedroomdecor.
Step 7: Renter‑Friendly Magic (a.k.a. Leave No Trace, Take All the Style)
If your lease is stricter than your high school dress code, you can still go full makeover—just with removable everything.
Trending rental‑friendly heroes:
- Peel‑and‑stick wallpaper – Use it on one accent wall, behind shelves, or to fake a headboard zone. Smaller areas mean fewer rolls and less cost.
- Peel‑and‑stick tiles – Perfect for backsplashes and bathroom floors. Your security deposit and future self will both approve.
- Command hooks and strips – For art, lightweight shelves, and mirrors. Create a gallery wall without drilling or a nervous email from your landlord.
- Slipcovers – Today’s trending slipcovers fit better, look cleaner, and hide questionable inherited upholstery. Pair with a textured throw to disguise any tell‑tale lines.
Remember: you are styling a space you live in, not a museum. As long as it is safe, removable, and makes you happy, you are doing it right.
Step 8: Style the Walls Like a Pro (Without Buying 47 Tiny Frames)
Budget makeovers are moving away from “clutter wall” and into “statement wall.” Think fewer, bigger pieces instead of a million small ones.
Try one of these trending approaches:
- One or two large art pieces – A big canvas over the sofa or bed looks more intentional than a scattered gallery of tiny prints. Check printable art shops and print at a local shop to save money.
- Framed fabric or wallpaper – Use leftover peel‑and‑stick or pretty fabric inside frames. Chic and wildly budget‑friendly.
- Oversized mirror – A tall floor mirror or wide wall mirror makes small spaces feel twice as big and twice as bright.
Rule of thumb: hang art so the center is roughly at eye level (around 57–60 inches from the floor). Your neck and your photos will both look better.
A One‑Weekend Budget Makeover Checklist
Ready to turn your space into the next “$300 living room makeover” success story? Use this quick checklist as your script.
- ✔ Declutter and remove anything you do not love or use.
- ✔ Rearrange furniture for better flow; create clear zones.
- ✔ Pick 1–2 paint projects: walls, accent zone, or key furniture piece.
- ✔ Swap or upgrade at least one light fixture; add a lamp or plug‑in sconce.
- ✔ Check rug size and curtain height—fix if they are too small or too low.
- ✔ Add or edit textiles: throw pillows, a cozy blanket, fresh bedding.
- ✔ Choose 1–2 statement wall pieces instead of many small ones.
- ✔ Add plants or greenery (real or faux—no judgment).
You do not have to do everything at once. Even one or two of these steps can make your home feel less “temporary chaos” and more “soft‑launch dream space.”
Your Home, But Make It Main Character (On a Supporting‑Role Budget)
Decorating on a budget is not about pretending to be someone with endless funds; it is about being wildly clever with what you do have: a few cans of paint, some decent lighting, and the bravery to admit that your current rug is, in fact, too small.
Start small. Pick one room, one wall, or even one corner and give it the full makeover treatment using these steps. Take before‑and‑after photos (trust me, you will want receipts), share your progress under hashtags like #homedecorideas, #livingroomdecor, or #bedroomdecor, and join the wonderfully chaotic world of budget DIY transformations.
Your home does not need to be perfect to be beautiful. It just needs to feel like you—on your most relaxed, most comfortable, “I love being here” kind of day. And you can absolutely create that feeling with a small budget, a bit of paint, and a handful of very smart choices.
Now, go grab that paint roller. Your before‑and‑after moment is waiting.
