
DIY Walls With Main-Character Energy: Textured Art & Limewash Magic on a Budget
There are two kinds of walls in this world: the ones that simply exist, and the ones that enter the room. If your walls are currently giving “printer paper in a fluorescent office,” don’t worry—we’re about to promote them to “boutique hotel lobby with a secret martini menu.”
Today’s hottest home trend is all about DIY textured wall art and limewash-style paint—aka big personality, tiny budget, zero need to sell a kidney for custom millwork. These projects are exploding across #walldecor and #DIYdecor because they look wildly expensive, photograph like a dream, and can usually be done in a weekend with basic tools and a playlist that slaps.
We’ll walk through:
- How to make dreamy, sculptural DIY textured wall art from joint compound and scrap materials
- How to get that soft, cloud-like limewash wall look (without messing with complicated traditional lime products)
- Where to use each look so your home feels curated, not chaotic
- Renter-friendly tricks so you get the glow-up without sacrificing your security deposit
Buckle up; your once-boring walls are about to develop main-character energy.
Why Everyone’s Suddenly Spackling Canvases and Cloud-Painting Walls
Textured wall art and limewash finishes hit the sweet spot between “I care deeply about aesthetics” and “I still like having money for takeout.” They’re trending because they check every modern decor box:
- High impact, low cost: You can fill a massive blank wall for the price of a restaurant dinner.
- Beginner-friendly: Imperfection is the vibe. It’s wabi-sabi, not “I messed up.”
- Renter-approved: Many projects live on canvases or panels you can take with you.
- Style chameleons: They work with boho, modern farmhouse, cozy minimalism, or that “I mix everything but it looks intentional” style.
- Algorithm gold: The before-and-after transformations are made for vertical video feeds.
In short, these projects give your home that “designer came over and had opinions” look—without actually hiring one.
DIY Textured Wall Art: Turning Joint Compound into Gallery-Level Drama
Think of DIY textured wall art as a sculpture that decided to lie down and become a painting. The idea is simple: slap joint compound (a.k.a. spackle) onto a surface, play with texture, paint it a dreamy neutral, and boom—instant art that looks like it costs three times your grocery budget.
What You’ll Need (A.K.A. Your Texture Toolkit)
- Joint compound (pre-mixed is easiest)
- Canvas, plywood, or MDF board
- Putty knives or a small trowel
- Sandpaper (optional, for smoothing)
- Paint in warm neutrals: ivory, sand, beige, taupe, or tone-on-tone shades
- Optional: thin wood trim to create a simple frame
Step-by-Step: From Blank to Bougie
- Prep your base.
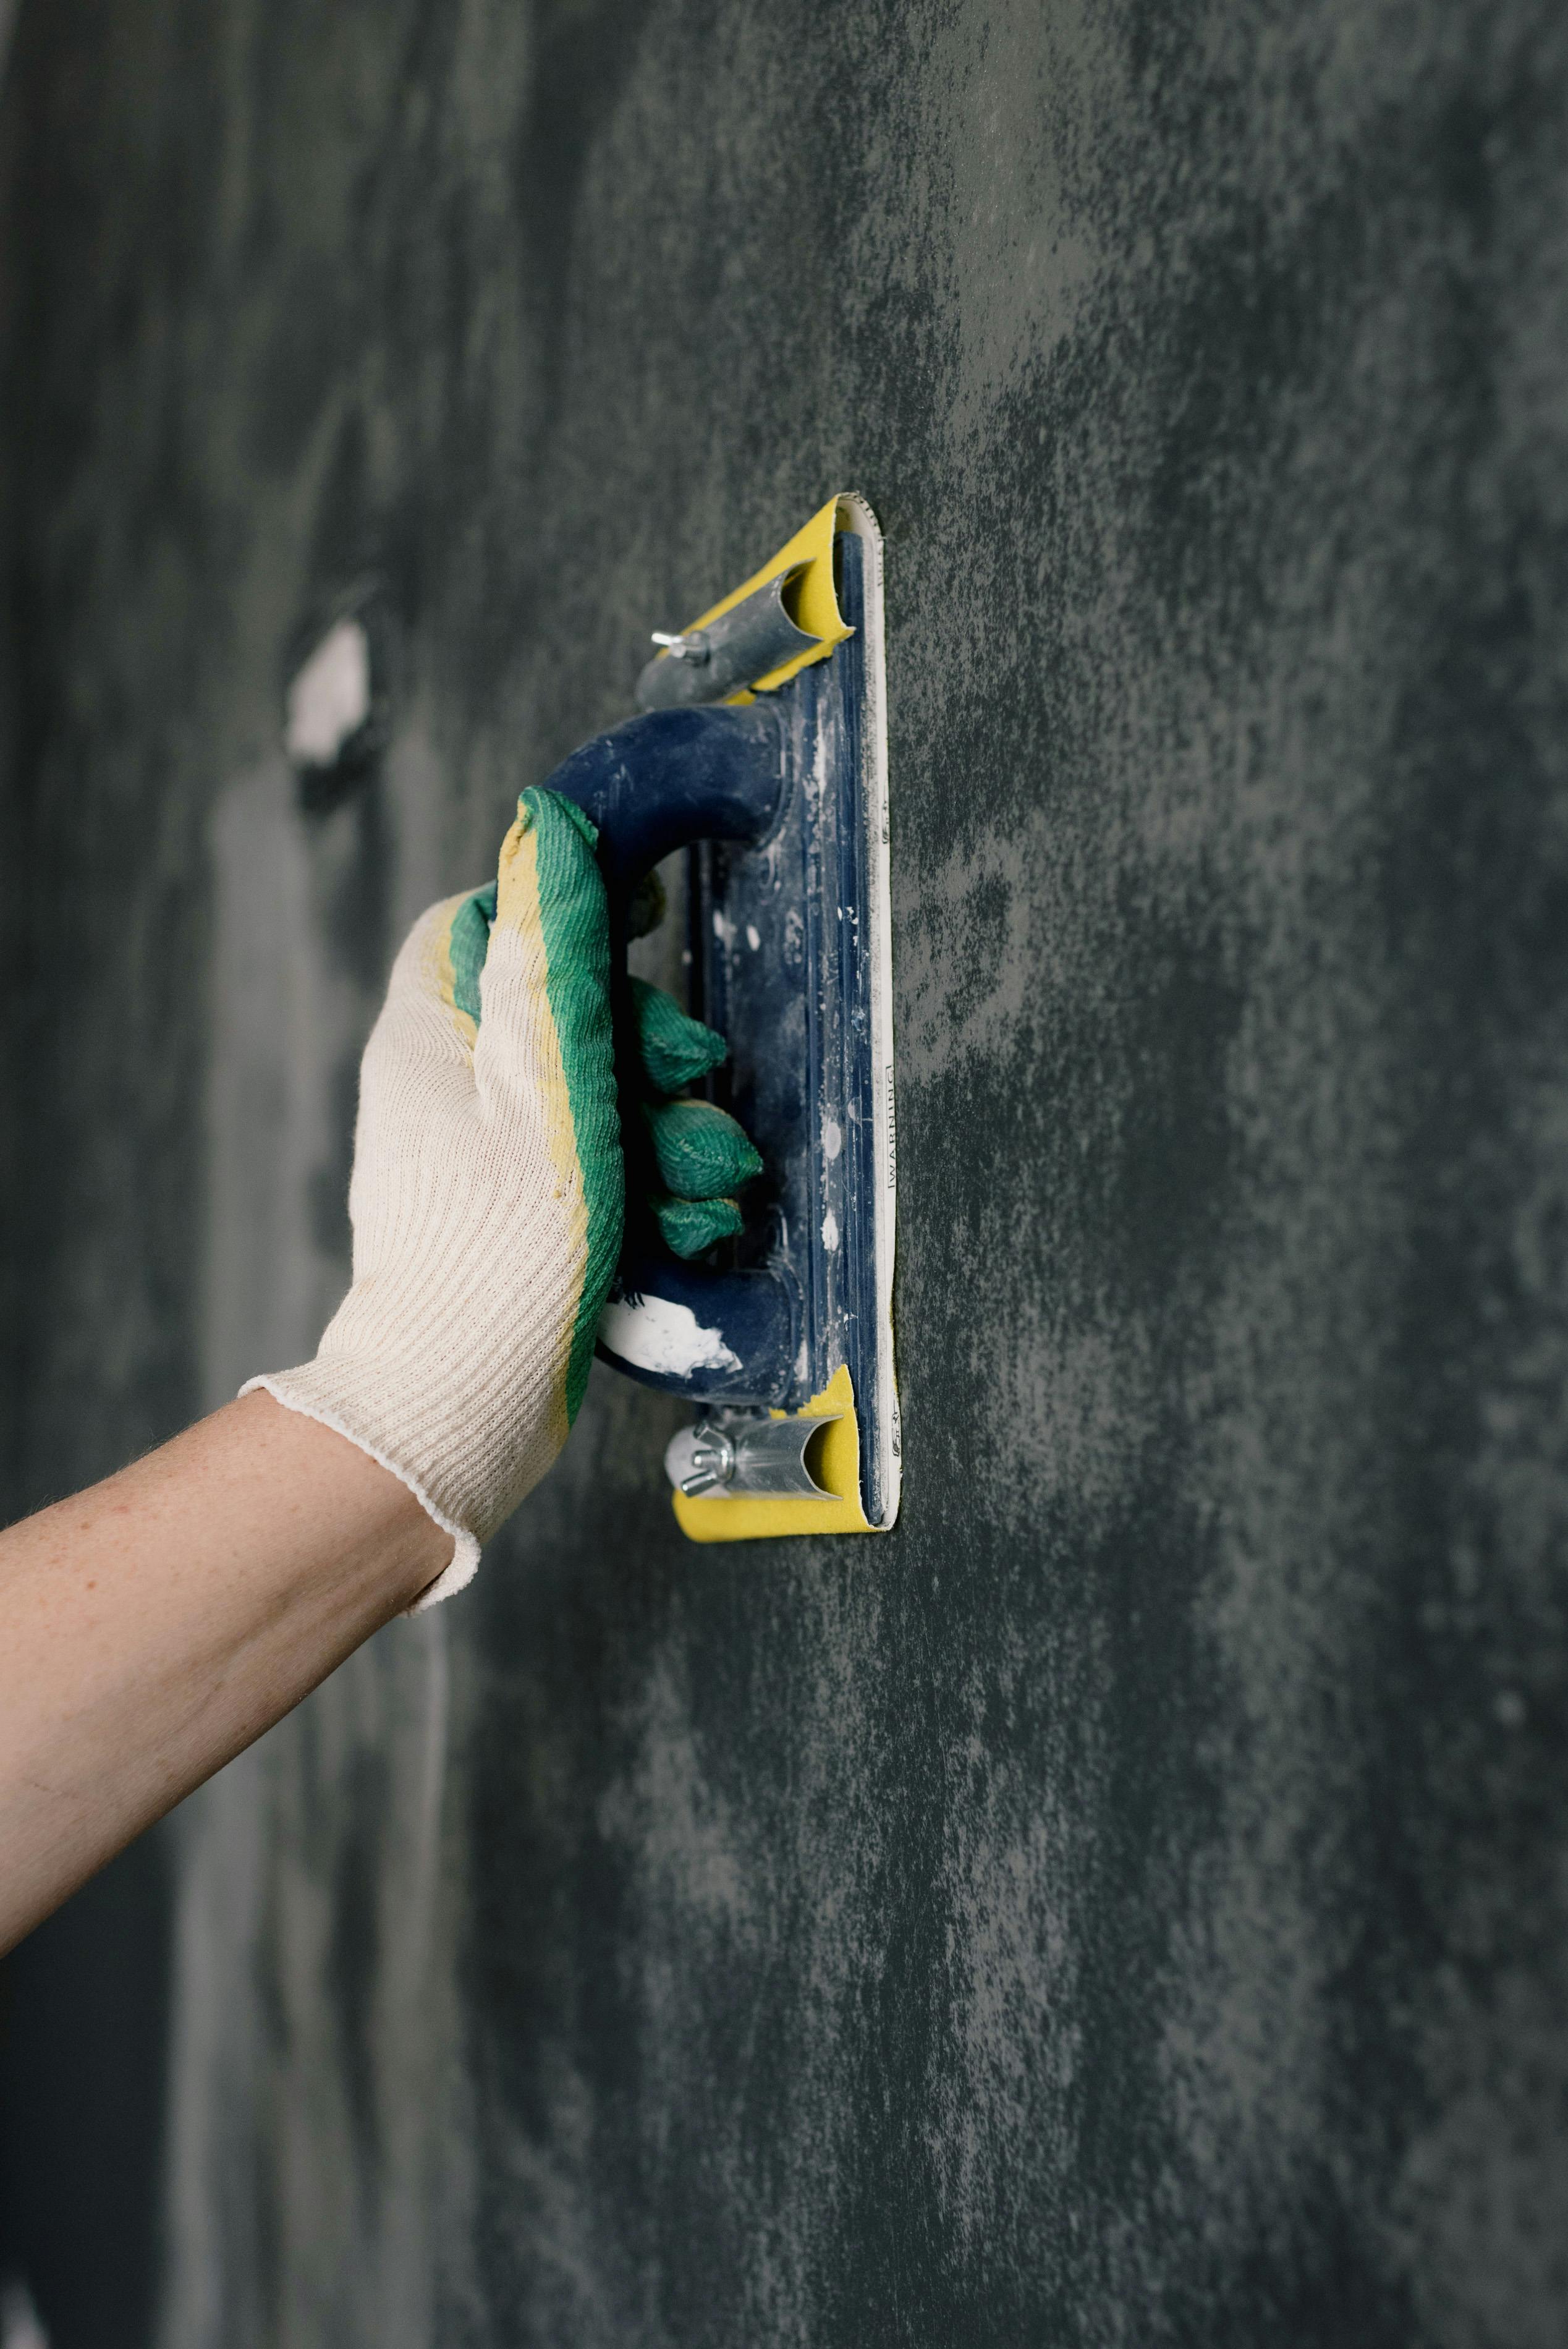
Lightly sand wood surfaces and wipe off dust. If your canvas is very slick, a quick coat of primer will help everything stick. - Spread the joint compound.
Use a putty knife or trowel to apply a layer of compound about 2–4 mm thick. Don’t panic about perfection—texture is the entire point. - Create your “signature move.”
While the compound is still wet, try:- Soft arches: Drag your knife in repeated curved lines to create architectural vibes.
- Waves: Use loose S-shaped motions for a calming, organic flow.
- Geometric lines: Score straight lines in segments for a modern, grid-like pattern.
- Random abstract: Overlap strokes like frosting a cake with strong opinions.
- Carve details.
Once it’s partly set (firm but not rock-hard), you can lightly carve in finer lines or erase areas with a damp sponge for softer transitions. - Let it dry. Fully.
Depending on thickness and humidity, drying can take 12–24 hours. This is a “do not poke me” situation. - Sand (if you want).
Light sanding can knock down any overly sharp ridges while keeping the overall texture. - Paint with intention.
Stick to warm neutrals and tone-on-tone palettes. The texture is the star; the color is the lighting crew. Dry brushing a slightly lighter or darker shade over raised areas will make details pop. - Frame or float.
Add thin wood trim for a minimalist frame or leave the edges raw for a gallery-chic look.
Where to Hang Your New Masterpiece
- Above the sofa: Create one oversized panel or a pair for symmetry.
- Over the bed: Use a wide, low piece as a soft headboard alternative.
- Hallways: Long, narrow pieces can turn a “just a corridor” moment into a mini gallery.
Bonus: If you’re renting and your landlord faints at the thought of nails, lean the art on a console or dresser. Very nonchalant, very “I just casually own large art.”
Limewash-Style Walls: Cloudy, Cozy, and Completely Addictive
Limewash walls are the interior design equivalent of soft-focus lighting in movies: flattering, atmospheric, and slightly magical. Traditional limewash uses slaked lime and mineral pigments for a chalky, nuanced finish—but it can be fussy for beginners. The good news? You can get the same moody, old-world-meets-modern look with user-friendly limewash-effect paints or a DIY watered-down matte paint technique.
Two Ways to Get the Look
- Limewash-effect products:
Many paint companies now sell “limewash look” or “mineral” paints that mimic the layered, cloudy texture without the learning curve. You apply them with a brush in irregular strokes to build movement and depth. - DIY diluted paint trick:
Use flat or matte paint in your chosen color and dilute it with water (often 1:1 or 2:1 paint to water—start small and test). Apply in overlapping X or cross-hatch strokes, letting your arm do a casual dance instead of rigid roller lines.
How to Apply Limewash-Style Walls Without Tears
- Prep the wall.
Fill major holes, sand rough spots, and wipe dust. If your wall is super patchy in color, a quick base coat of flat paint in a close shade helps. - Choose your brush, not a roller.
Use a large masonry or limewash brush, or a wide synthetic brush. The brush strokes create that cloudy, hand-finished effect. - Work in sections.
Start at the top corner and work in manageable zones, always brushing into the still-wet edge to avoid harsh lines. - Embrace movement.
Apply in X strokes, swoops, and overlapping passes. If an area looks too solid, drag a damp brush lightly across it to soften. - Layer for depth.
Once the first coat dries, you can add a second thinned coat in either the same color or a barely-there tint darker or lighter for extra depth.
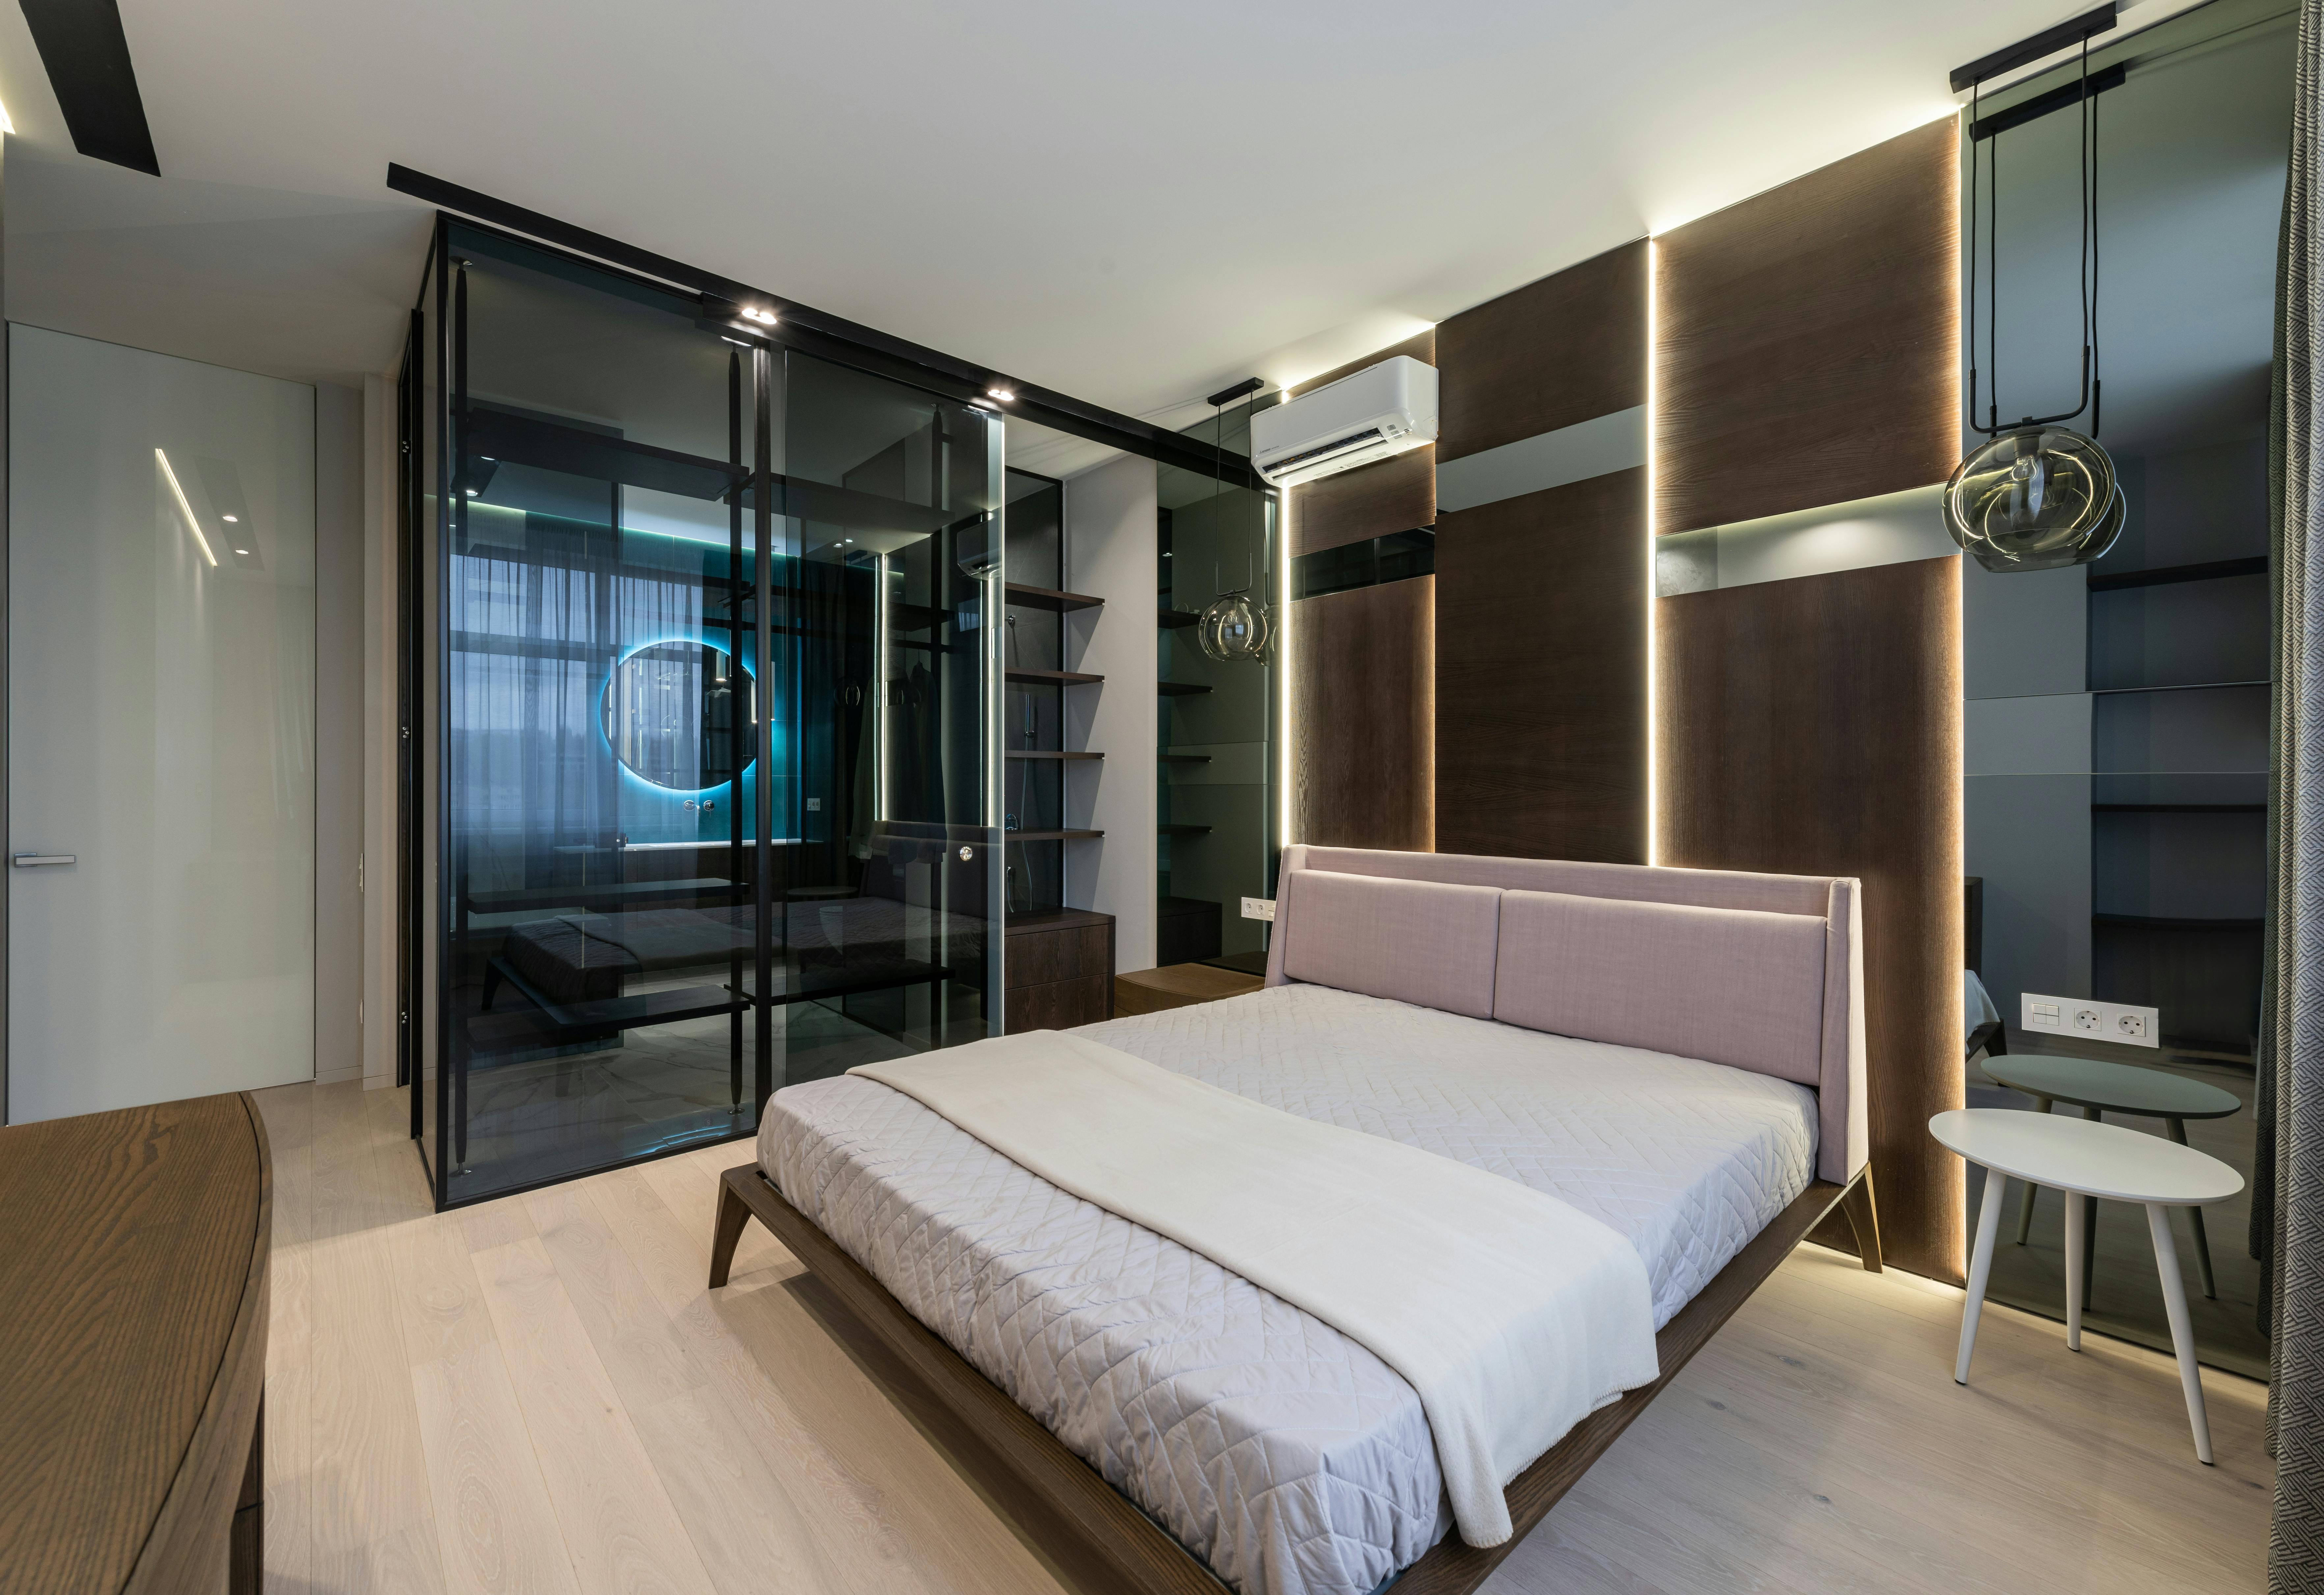
Where Limewash Walls Really Shine
- Living room feature wall: Behind the sofa or TV, limewash adds depth so the wall feels like part of the decor, not just background scenery.
- Bedroom headboard wall: A soft, clouded finish behind the bed feels cozier and more relaxed than bold, busy wallpaper.
- Dining nook or breakfast corner: Pair a limewashed wall with natural wood, linen, and simple pendant lighting for instant café energy.
The beauty of limewash-style walls is that they’re forgiving—if a section dries weird, you can always layer a bit more diluted paint over it and call it a design decision.
How to Style Your New Fancy Walls So They Don’t Have to Work Alone
Once your walls are upgraded, everything else in the room needs to stop slacking. The key is balance—let the texture and movement shine while the rest of the space plays supporting roles.
For DIY Textured Wall Art
- Keep nearby decor simple.
Pair textured art with clean-lined furniture and neutral textiles so the piece doesn’t have to shout over patterned curtains and ten throw pillows. - Echo the texture elsewhere.
Add a chunky knit throw, a ceramic vase with a matte finish, or a jute rug to quietly repeat the tactile theme. - Play with scale.
Oversized art in a small room = deliberate and modern. Just make sure your frame or canvas fills at least two-thirds of the furniture width beneath it.
For Limewash Walls
- Layer in natural materials.
Think wood, linen, stone, and woven textures. They vibe beautifully with the soft, organic wall finish. - Use simple, sculptural shapes.
Rounded side tables, curved headboards, and organic pottery look especially good against a soft, cloudy backdrop. - Let the wall breathe.
Avoid overcrowding limewashed walls with heavy gallery walls. A few carefully chosen pieces or one large mirror will let the finish stay visible.
Renter-Friendly & Budget Hacks (Your Deposit Will Be Fine)
You don’t need to own your home—or your own power tools—to play in this sandbox. A few tweaks make these trends fully renter-safe and wallet-friendly.
Renter-Friendly Moves
- Use panels instead of walls.
Create limewash-style finishes or textured art on large plywood or MDF panels, then lean or hang them like oversized art. - Removable mounting.
Use heavy-duty removable strips or hooks rated for the weight of your piece so you’re not patching a dozen holes later. - Go for subtle paint.
If you’re allowed to paint, choose soft neutrals that are easy to cover with one or two coats of standard white when you move out.
Budget-Conscious Tricks
- Shop your leftovers.
Use leftover wall paint samples and scrap wood. Joint compound is usually inexpensive and goes a long way. - Make one big statement.
Instead of decorating every wall, pick one focal wall or one large art piece. Intentional restraint looks luxe. - Batch your projects.
If you’re already opening paint and compound, create two or three pieces in one session for coordinated decor in different rooms.
Pro tip: When in doubt, go calmer with color and bolder with texture. Timeless neutrals plus interesting surfaces age much better than trend-of-the-month shades.
Putting It All Together: From Blank Box to Boutique Vibes
You don’t need a full renovation to change the entire energy of a room. A single limewashed feature wall behind your sofa and one oversized DIY textured art piece can change the space from “I just moved in” to “I have a Pinterest board and I am not afraid to use it.”
Start small: try a textured art panel for that awkward blank spot above a console. Once you realize you can wield a putty knife like a minimalist Michelangelo, graduate to a limewash-style wall in your bedroom or living room. Layer in cozy textiles, warm lighting, and a few sculptural accessories, and suddenly your home will feel like the backdrop to a lifestyle shoot.
Your walls are going to be so interesting, your friends might forget to ask about your life updates. (Which, honestly, some weeks is a blessing.)
Image Recommendations (Strictly Relevant Only)
Below are carefully curated, strictly relevant image suggestions. Each image directly supports a specific part of the blog and visually explains the described concept.
Image 1: DIY Textured Wall Art in Progress
- Placement location: After the ordered list under “Step-by-Step: From Blank to Bougie” in the “DIY Textured Wall Art” section.
- Image description: A close-up, realistic photo of a large canvas or MDF board lying flat on a worktable. Joint compound is being spread across the surface with a metal putty knife or small trowel, showing visible raised abstract patterns and arches. There should be a tub of joint compound nearby, along with an extra putty knife, but no people visible—only hands if absolutely necessary, though ideally the tools and surface speak for themselves. Background should be a simple indoor workspace with no distracting decor.
- Supported sentence/keyword: “Use a putty knife or trowel to apply a layer of compound about 2–4 mm thick… try soft arches, waves, or geometric lines.”
- SEO-optimized alt text: “DIY textured wall art with joint compound being spread on a large canvas using a putty knife to create raised abstract patterns.”
- Example source URL: https://images.pexels.com/photos/5691606/pexels-photo-5691606.jpeg
Image 2: Finished Limewash-Style Living Room Feature Wall
- Placement location: After the unordered list under “Where Limewash Walls Really Shine” in the “Limewash-Style Walls” section.
- Image description: A realistic interior photo of a living room with a clear limewash-style feature wall behind a sofa. The wall should show visible variation in color and soft, cloud-like brush strokes in a warm neutral tone. Furniture should be simple and modern—neutral sofa, perhaps a wood coffee table, and minimal decor—so the limewashed wall is clearly the focal point. No people in the image.
- Supported sentence/keyword: “In living room decor, limewash is often used on a single accent wall behind a sofa, TV, or fireplace.”
- SEO-optimized alt text: “Living room with a warm neutral limewash feature wall behind a modern sofa and minimalist decor.”
- Example source URL: https://images.pexels.com/photos/6585613/pexels-photo-6585613.jpeg
Image 3 (Optional): Textured Art Styled Above a Bed
- Placement location: After the unordered list under “Where to Hang Your New Masterpiece” in the “DIY Textured Wall Art” section.
- Image description: A realistic bedroom interior showing a large, neutral-toned textured art piece hung above a bed. The artwork should clearly have raised, sculptural texture and be in calm, warm neutrals. Bedding should be simple (white or beige) with perhaps a linen throw, and minimal bedside decor like a small lamp or vase. No people present in the scene.
- Supported sentence/keyword: “Over the bed: Use a wide, low piece as a soft headboard alternative.”
- SEO-optimized alt text: “Neutral bedroom with large sculptural textured wall art hanging above the bed as a headboard alternative.”
- Example source URL: https://images.pexels.com/photos/6588585/pexels-photo-6588585.jpeg
