
DIY Wall Panel Glow-Up: Slat Walls, Paneling & Statement Walls That Look Expensive (But Aren’t)
The Wallflower Glow-Up: Turning Plain Walls into Main Characters
DIY-friendly wall paneling, slat walls, and statement wall decor are the latest budget-smart way to make rooms look custom, cozy, and camera-ready without a full renovation. In this playful guide, we’ll walk through how to turn plain walls into architectural superstars with fluted panels, slats, and molding—plus renter-friendly tricks, color ideas, and styling tips—so your home feels like a high-end boutique hotel on a thrift-store budget.
Your walls have been quietly minding their own business for years—blank, beige, and frankly a little bored. Meanwhile, social media is out here giving us before-and-after wall transformations so satisfying they should come with a warning label. The big news in home decor right now? DIY wall paneling, slat walls, and architectural statement walls are everywhere, and they’re shockingly doable even if your tool kit currently consists of a butter knife and optimism.
From fluted bedroom headboards to slatted TV walls that hide your cable chaos, homeowners and renters are turning flat drywall into “did you hire a designer?” moments—on weekend-project budgets. Let’s turn your walls from background extras into award-winning leads.
Why DIY Wall Paneling Is Trending Hard Right Now
If 2020 was the year of the gallery wall, 2025 is the year your walls grew abs. We’re talking texture, depth, and shadow lines that make every room look like it got accepted to design school.
- Big impact, small budget: A few MDF strips, wood slats, or fluted panels can turn a flat wall into a custom architectural feature—no sledgehammer or second mortgage required.
- Perfect for content creators: As more people work and film at home, paneling creates gorgeous, consistent backdrops for Zoom calls, Reels, and that “I definitely woke up like this” story.
- Weekend warrior–approved: Most projects can be tackled in a day or two with basic tools and some patience (and maybe a podcast binge).
- Renter-friendly options: Peel-and-stick panels, removable slats, and faux-beadboard hacks mean even renters can join the statement-wall party without triggering their landlord.
The best part? These projects photograph incredibly well—which is why your feed is full of them—and they look even better IRL.
Inspiration Break: Modern Paneling in the Wild
Before we dive into the how-to, a little eye candy. Picture this kind of transformation on your own walls:
Meet the Wall All-Stars: Slats, Flutes & Friends
There isn’t just one way to dress a naked wall. Here’s the current dream team of DIY wall treatments and when to use them.
1. Board-and-Batten: The Reliable Rom-Com Lead
Classic, charming, and always a good idea. Vertical or square grid battens over a plain wall instantly add structure. It’s beloved in farmhouse and modern traditional spaces, especially in entryways, dining rooms, and bedrooms.
Try it: Half-height in a hallway, topped with a ledge shelf for art and keys. Paint it a rich moody green or deep navy for a quiet-luxury twist.
2. Picture-Frame Molding: The Fancy Friend With a Trust Fund
Slim molding arranged in symmetrical rectangles or squares gives your walls that Parisian apartment glow—no passport required.
Best for: Living rooms and bedrooms where you want a little elegance without going full palace. Pro move: Paint the walls, trim, and molding all one color in a matte finish for a modern, cocoon-like feel.
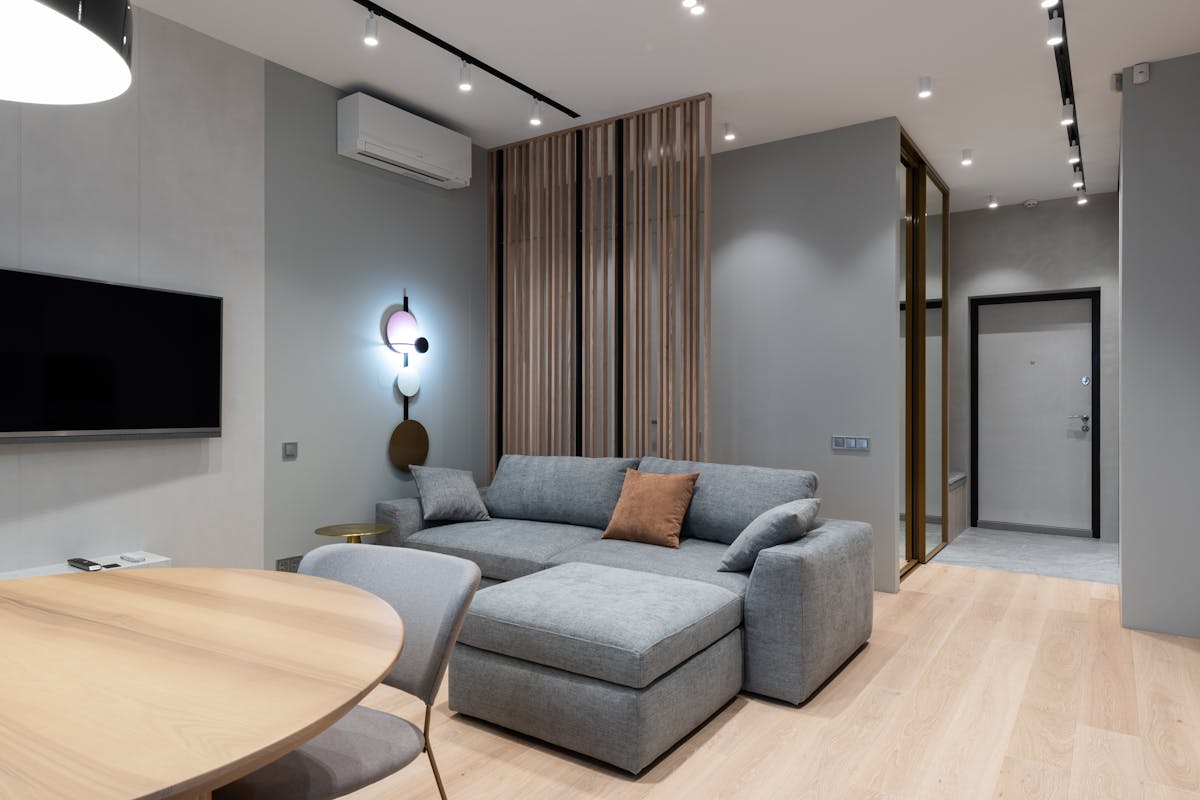
3. Slat Walls: The Cool, Minimalist Influencer
Vertical wood or MDF slats spaced evenly across a wall: sleek, architectural, and very “I drink my coffee black and own at least one linen shirt.”
- Living rooms: Slatted TV walls that hide cables and visually corral your media zone.
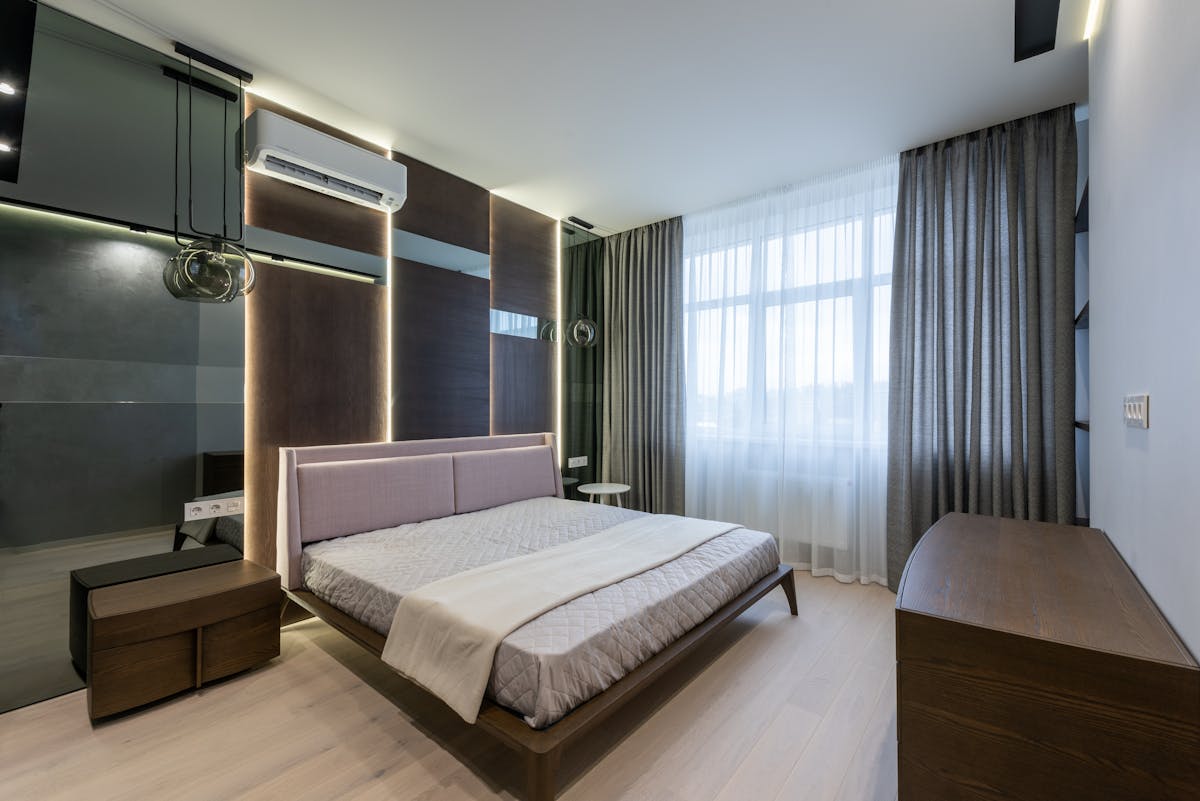
- Bedrooms: Slatted headboard walls in warm oak tones or painted to match the wall for subtle texture.
- Function bonus: Can help soften echoes and improve acoustics—your meetings and voiceovers will thank you.
4. Fluted Panels: The Soft-Spoken Show-Off
Fluted or ribbed panels are the slightly extra cousin of slat walls—more curves, more shadow play. Trending hard behind beds, sideboards, and TV units.
Style it with: Warm neutrals, boucle fabrics, and soft brass or black fixtures for that “quiet luxury but I still drink boxed wine” vibe.
5. Beadboard & Shiplap: The Cozy Crowd-Pleasers
These are still going strong in farmhouse and coastal spaces—but we’re seeing them refreshed with bolder colors and cleaner styling.
Modern update: Go vertical, skip the heavy distressing, and pair with simple, modern furniture instead of leaning into full rustic mode.
Plan First, Panic Never: How to Design Your Statement Wall
Before you start impulsively gluing things to your drywall, a little planning will save you heartache—and spackle.
- Pick the right wall: Aim for the natural focal point:
- Behind the sofa
- Behind the bed (headboard wall)
- TV wall
- Entry wall you see first when you walk in
- Measure like you mean it: Measure wall width and height, mark outlets and switches, and sketch your design. Even a napkin doodle counts.
- Mock it up with tape: Use painter’s tape to lay out battens or slat spacing on the wall. Step back, squint thoughtfully, adjust until it feels right.
- Choose your vibe: Decide if you’re:
- Farmhouse softie (white beadboard, greige board-and-batten)
- Boho dreamer (textured plaster, arches, warm earthy tones)
- Minimalist chic (slat walls, tone-on-tone paneling, matte finishes)
Design tip: The bolder the texture, the calmer your color palette can be. Let one of them be the diva, not both.
DIY Wall Paneling in 7 Not-So-Scary Steps
This is the basic roadmap most creators follow, whether they’re doing board-and-batten, picture-frame molding, or slat walls.
- Prep the wall: Remove nails and hooks, lightly sand any rough spots, wipe everything down. No one wants crumbs under their crown molding.
- Mark your layout: Use a level and pencil to mark where each batten or slat will go. Take a photo—future you will forget where that line went.
- Cut your pieces: Use MDF strips or wood for battens and slats. Many home improvement stores will cut long pieces down for you if you ask nicely (and pay a small fee).
- Attach to the wall: Common methods:
- Construction adhesive + brad nails into studs
- For renters: heavy-duty removable strips or cleats designed to be taken off later
- Fill, caulk, sand: Fill nail holes, caulk gaps between wall and trim, then sand lightly for a smooth finish. This is the “Instagram vs. reality” step that makes the difference.
- Prime & paint: Use a primer if you’re painting raw wood or MDF. For a modern look, choose matte or eggshell on walls; satin if you want a bit more durability and wipe-ability.
- Style it: Once dry, bring in art, sconces, plants, or a statement mirror. Don’t cover the whole wall—you did a lot of work. Let it breathe.
Renter-Friendly Wall Magic (Because Deposits Matter)
Just because your name isn’t on the deed doesn’t mean your walls have to suffer.
Trending renter hacks right now:
- Peel-and-stick paneling: Lightweight faux slats, pseudo–beadboard, and textured panels you can peel off later with minimal drama.
- Freestanding headboard walls: Build a paneled or slatted “wall” that stands behind your bed, secured with furniture, not screws.
- Foam or lightweight slats: Attach with removable strips for a 3D look that won’t require an apology letter when you move out.
- Limewash and arches with paint: If your landlord allows painting, soft limewash textures and painted arches create visual depth without physical panels.
Pro tip: Always patch and paint back before moving out. Future-tenant you will appreciate the good karma.
Color & Finish: Dressing Your New Wall for the Party
Once you’ve added texture, color choice is where the magic happens. Current crowd favorites:
- Warm whites & taupes: Ideal for “quiet luxury” vibes. Think creamy whites, soft taupe, and mushroom tones that play nicely with everything.
- Deep greens & blues: Forest green, ink blue, and charcoal-teal are beloved behind beds and sofas. They’re dramatic but still soothing.
- Earthy boho tones: Terracotta, sand, camel, and clay work beautifully with textured plaster and arches.
- Monochrome magic: Painting trim, paneling, and walls the same color (different sheens optional) keeps things chic and modern.
For finishes:
- Matte: Hides wall imperfections, very “designer,” but a bit more delicate.
- Eggshell: A solid all-rounder—soft sheen, more washable.
- Satin: Great for high-traffic zones and kids’ rooms.
Styling Your New Statement Wall So It Doesn’t Get Shy
You’ve done the work—now let’s style it so it looks intentional, not accidental.
- Don’t over-decorate: Heavy paneling + 47 small frames = visual chaos. Go for a few larger pieces or sconces, or even leave it art-free and let the texture talk.
- Layer your lighting: Wall sconces, picture lights, or uplighting can emphasize the texture and turn evening shadows into a design feature.
- Anchor with furniture: Your sofa, console, or bed should sit confidently in front of the wall—not awkwardly floating nearby like it’s unsure if it’s invited.
- Repeat the material: Echo wood tones or colors elsewhere: a wood coffee table to match your slats, a throw pillow that repeats your wall color.
Design rule of thumb: If your wall is the main character, let the decor be the supporting cast—not the whole ensemble fighting for lines.
Common Wall Paneling Mistakes (And How to Dodge Them Gracefully)
Learn from other people’s oops moments so you can skip straight to the “wow, you did that?” comments.
- Too tight or uneven spacing: Use spacers or a scrap piece of wood between slats so your gaps stay consistent. Your eyes will notice if one rogue gap goes off script.
- Ignoring outlets and vents: Plan around them from the start, or cut precise notches so they blend in. A half-covered outlet screams “I tried my best” in the wrong way.
- Skipping caulk and filler: Those tiny gaps and nail holes might look small now, but paint will highlight them like stage lighting. Caulk is your secret soft-focus filter.
- Going too busy in a small room: If your room is petite, choose simpler patterns or half-height treatments so the space doesn’t feel like a maze.
Ready to Make Your Walls Famous?
DIY wall paneling and slat walls aren’t just a trend—they’re a smart, high-impact way to add value, character, and personality to your home without tearing it apart. Whether you’re going full accent wall behind the sofa, creating a slatted headboard moment, or sneaking in a renter-friendly faux panel behind your desk, your walls are about to level up.
Start with one wall, one weekend, and one good playlist. By Monday, your space could look like you hired an interior designer—secretly, it was just you, a caulk gun, and a dream.
When your friends ask, “Who did your walls?” just smile mysteriously and say, “Oh, you know…we’re very DIY over here.”
